There are several third-party Windows PE rescue disks that you can download and use, like Hiren’s BootCD PE. If you’re wary about trusting a third-party solution, especially with potential piracy issues, you can build your own using Win10XPE. Let’s walk you through how to create your own Windows PE rescue disk.
Creating a Windows PE Rescue Disk
To create a Windows PE rescue disk, you’ll need a recent copy of the Windows 10 installation media. Microsoft provides Windows 10 ISOs for download, but you’ll need to change your browser user agent to Chrome OS or Android first to be able to download the file from the Microsoft website.
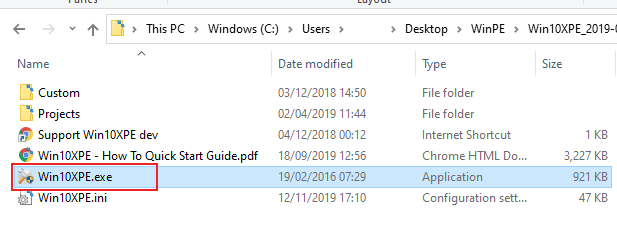
If you have a Windows 10 ISO downloaded, you’ll need to download the latest version of Win10XPE next. Extract your Windows 10 ISO and the compressed Win10XPE 7Z file using 7-Zip, then run the Win10XPE.exe file.
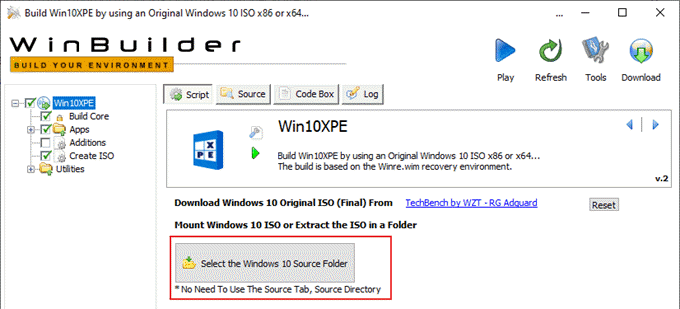
When you first launch Win10XPE, you’ll need to point it to the location of your extracted Windows 10 installation files. Click Select the Windows 10 Source Folder in the main Win10XPE menu.
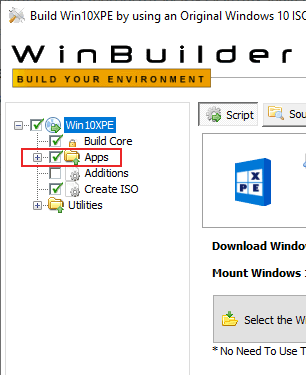
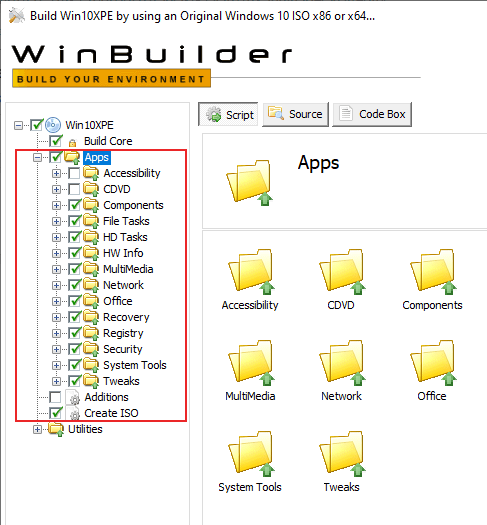
Once the Windows 10 installation files have been loaded into Win10XPE, you can begin customizing the tools you want to include with your WinPE disk. In the left-hand menu, click the + arrow next to Apps to expand that section.
From here, work through each of the sub-categories to select which tools you want to add. Win10XPE will use a default configuration, selecting tools it believes you’ll find useful. You can leave these as they are, but to add them to your environment, click the checkbox next to each option.
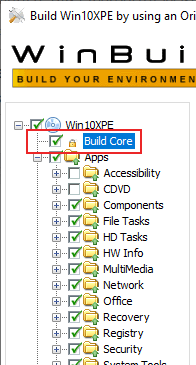
You’ll also need to modify the Build Core configuration. This sets various settings, like keyboard layout and locale, for your WinPE build. Click on Build Core in the left-hand side menu.
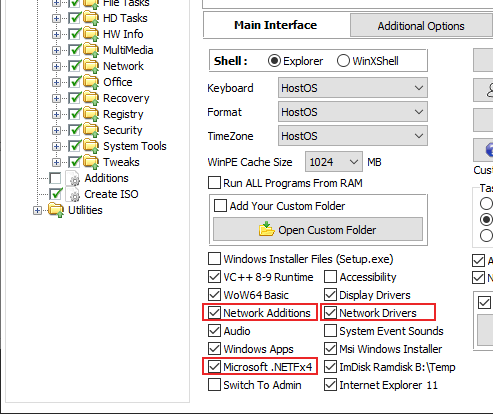
The default Build Core menu configuration should work for most users. If you want to use a wireless network connection in WinPE, however, be sure to enable the Network Drivers, Network Additions and Microsoft .NETFx4 checkboxes in the Main Interface tab.
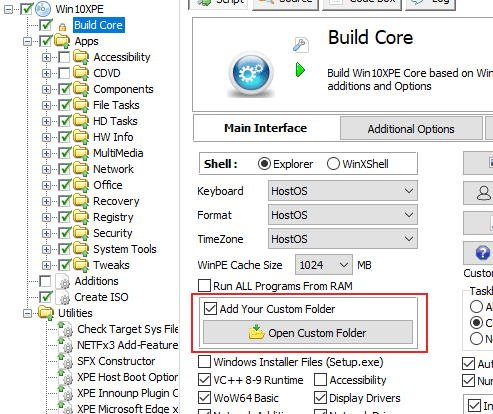
You can also add custom files to your WinPE environment. These could be portable tools, like those available for download at PortableApps, or additional configuration files. To set Win10XPE to add these, click on the Add Your Custom Folder checkbox, then click the Open Custom Folder button to copy your files to that location.
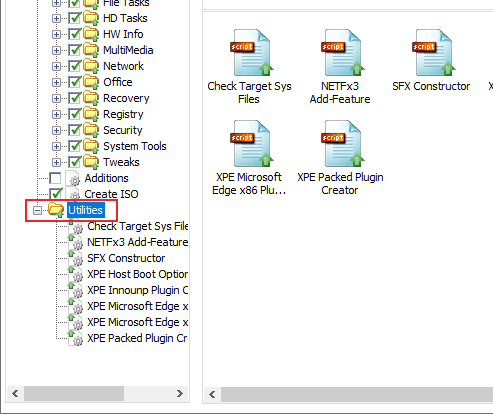
The final Utilities menu shouldn’t require configuration for most users. If you do need to configure this section, for instance, to enable the .NET Framework 2.0-3.5, click on the + arrow next to Utilities in the left-hand side menu.
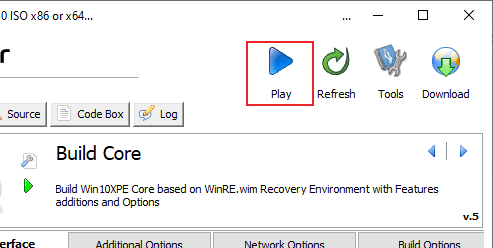
Once your Win10XPE configuration is ready and your files are in place, you can build it. Click the Play button in the top-right to begin the build process.
Win10XPE turns your custom Windows PE environment into an ISO file. Once the build process is complete, you can flash the ISO file contents to a USB flash drive using Rufus. Etcher is a popular alternative to Rufus, but this has known problems with flashing Windows 10 ISOs to flash drives. In this case, it’s better to use Rufus.
Copying Windows PE To a USB Flash Drive
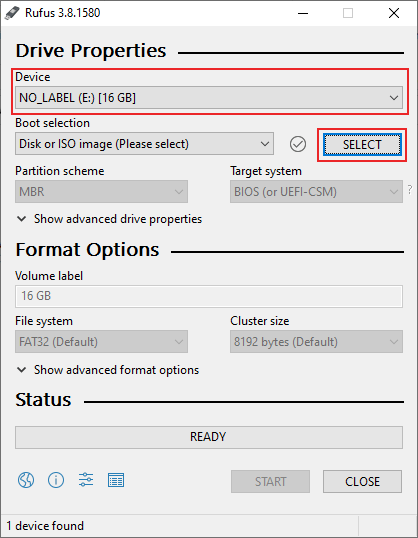
To flash your custom Windows PE ISO to a USB flash drive, you’ll need to have downloaded the latest version of Rufus. It doesn’t require installation, so just launch the Rufus.exe file once it’s downloaded.
First, select your flash drive from the Device drop-down menu, then select your ISO by clicking the Select button next to the Boot Selection menu.
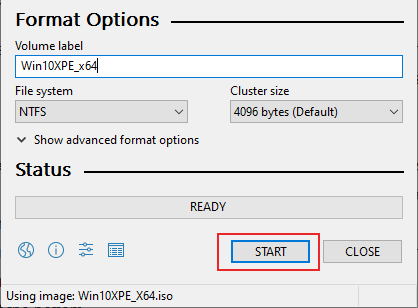
Once you select your ISO file, Rufus will automatically configure to match the most appropriate settings for it. Once you’re ready to begin flashing, click START at the bottom.
Once the Rufus flashing process has completed, reboot your PC with your flash drive plugged in. The custom Windows PE environment should then boot, allowing you to begin recovering your Windows installation.
Using The Windows Recovery Environment (WinRE)
If you’re looking for a built-in solution, Windows 10 users can use the Windows Recovery Environment (WinRE) instead. While WinPE is customizable, WinRE is a set-in-stone solution that includes tools to repair your file system, restore Windows to a previous backup, restore Windows to factory settings, and more. The benefit of the Windows Recovery Environment over the Windows Preinstallation Environment is all Windows 10 users have the WinRE tool installed already.
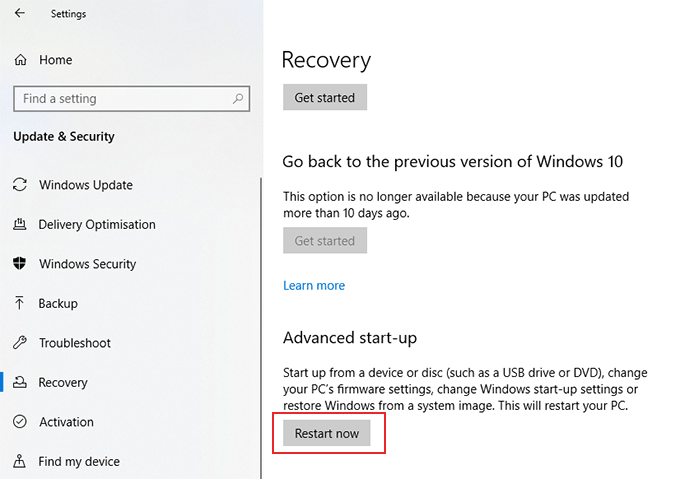
If you’ve been able to boot into Windows 10, you can boot to WinRE by going to the Advanced Startup settings menu. Right-click your Windows Start menu button and click Settings. From here, click Update & Security > Recovery > Restart now. This will boot your PC into your Windows 10 advanced boot menu.
You can also boot into the Windows Recovery Environment by aborting the Windows 10 start-up process at least twice. Once WinRE has loaded, you might need to click Advanced Options > Troubleshoot to access the various included recovery tools. If your Windows installation is beyond repair, then you may need to wipe and reinstall Windows 10 instead.

