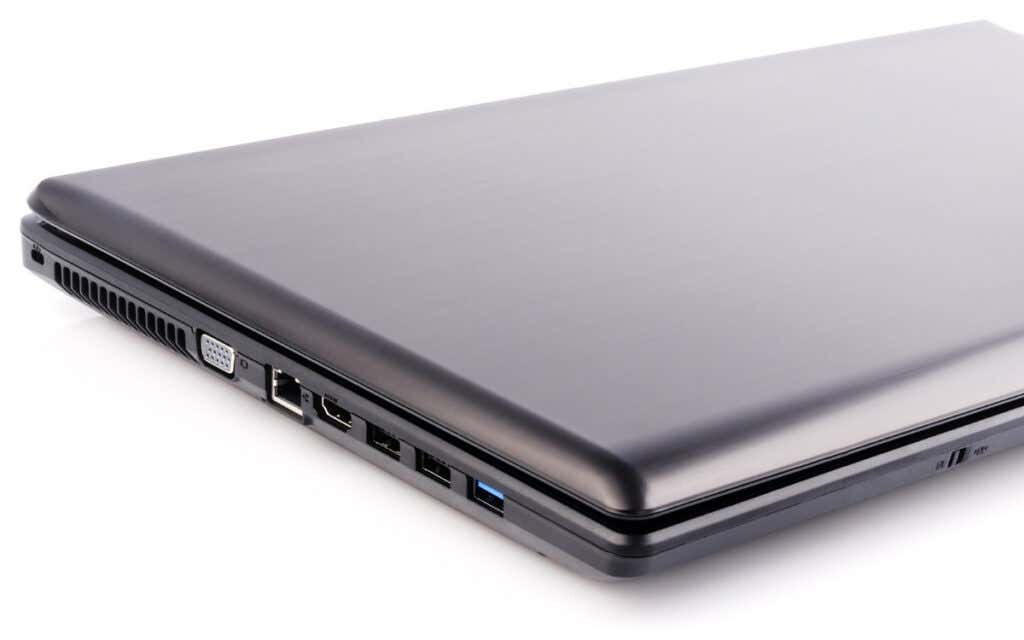
If you’ve hooked up an external monitor to your laptop, you might prefer closing the laptop’s lid and maybe placing the device on a vertical stand to free up desk space. Sadly, the default power options in Windows prevent you from doing that. Shut the lid, and you trigger sleep mode. In this article, you will learn how to keep your Windows 11 or 10 laptop on even with the lid closed by re-configuring the power button and lid settings. You will also learn how to troubleshoot your computer if closing its lid continues to put it to sleep despite having your preferences set up correctly.
Change What Happens When You Close the Laptop Lid
To keep your PC from sleeping when you close the lid on your laptop, you must tweak the power settings for your Windows 11/10 PC, so it stays awake. For that, you must access the Power Options management console via the Control Panel.
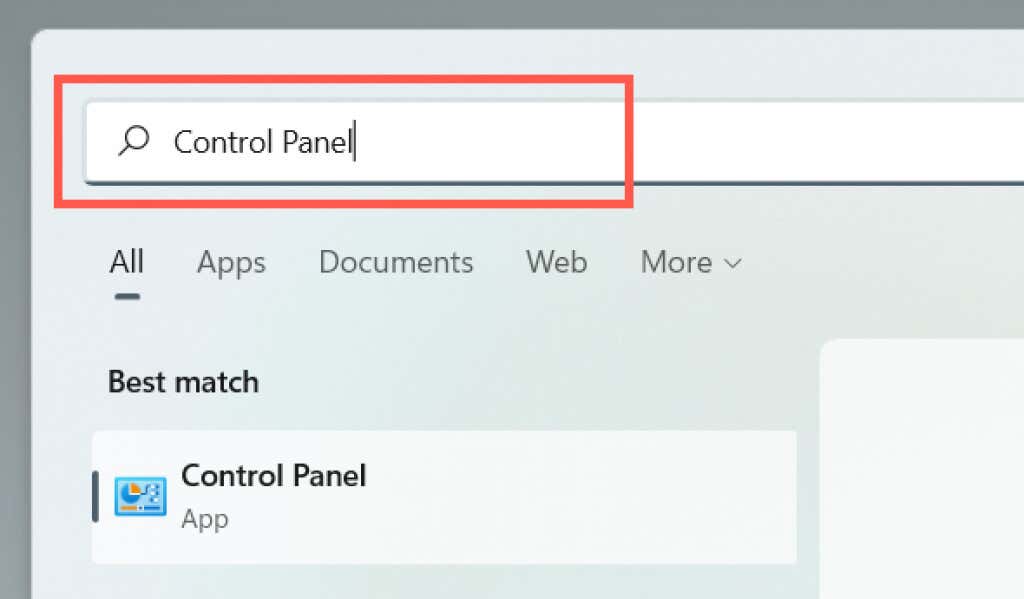
- Open the Start menu, type Control Panel, and select Open.
- Select the category labeled Hardware and Sound.
- Select Power Options. Note: On a Windows 10 laptop, you can access the screen that follows by right-clicking the Battery icon on the system tray (right-corner of the taskbar) and selecting Power Options.
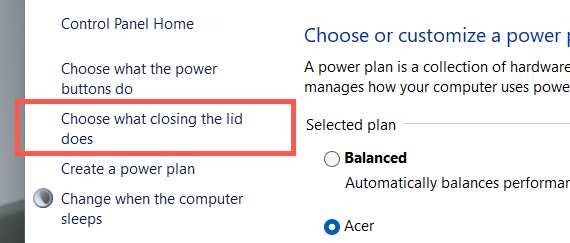
- Select Choose what closing the lid does on the left side of the Power Options window.
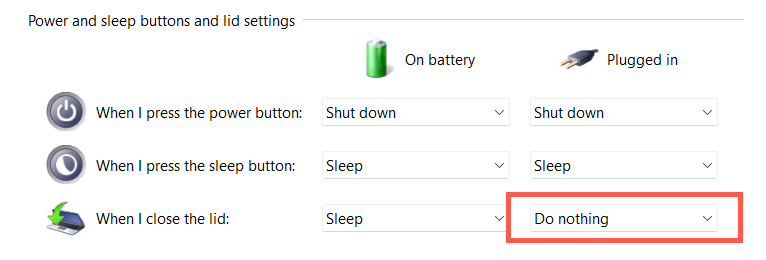
- Use the drop-down menus next to the When I close the lid section to determine how your laptop behaves when you close its lid. The default preferences are set to Sleep/Hibernate for both On battery and Plugged in. To make it stay awake, change that to Do nothing. Warning: Configuring your laptop to stay awake while on battery power can cause accidental heat damage—e.g., if you put the device into a bag while it’s still running. We recommend that you only change the lid preferences to Do nothing for the Plugged in column.
- Select the Save changes button to apply your changes. You can now close your laptop and continue using the operating system via an external display, keyboard, and mouse. If you want to change your lid preferences back to how they were, repeat the steps above and switch from Do nothing to Sleep/Hibernate.
Closing Lid Still Forces Laptop to Sleep? Try These 7 Fixes
If closing the lid of your laptop still causes the operating system to go to sleep despite modifying the device’s power button and lid preferences, restart the device. If that doesn’t help, here are several fixes that you can work your way through to resolve the issue.
1. Reset Power Settings to Defaults
It’s best to begin by reverting the power plan for your laptop to its default settings. That should resolve conflicting or broken configurations preventing it from applying your lid preferences.
- Open the Power Options window and select Change plan settings next to the active power plan.
- Select Restore default settings for this plan.
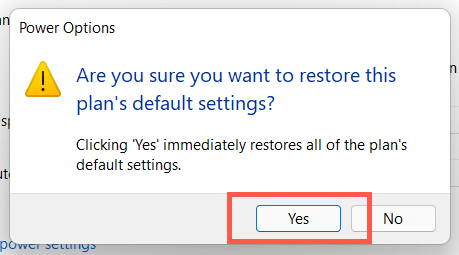
- Select Yes to confirm. You must then head back to the previous screen, select Choose what closing the lid does, and re-configure the lid settings to keep your laptop running with its lid closed. If the issue persists, try creating a new power plan.
2. Run the Power Troubleshooter
Both Windows 11 and 10 come with a built-in troubleshooter that can detect and resolve issues with conflicting power management settings. Run it and check if that makes a difference.
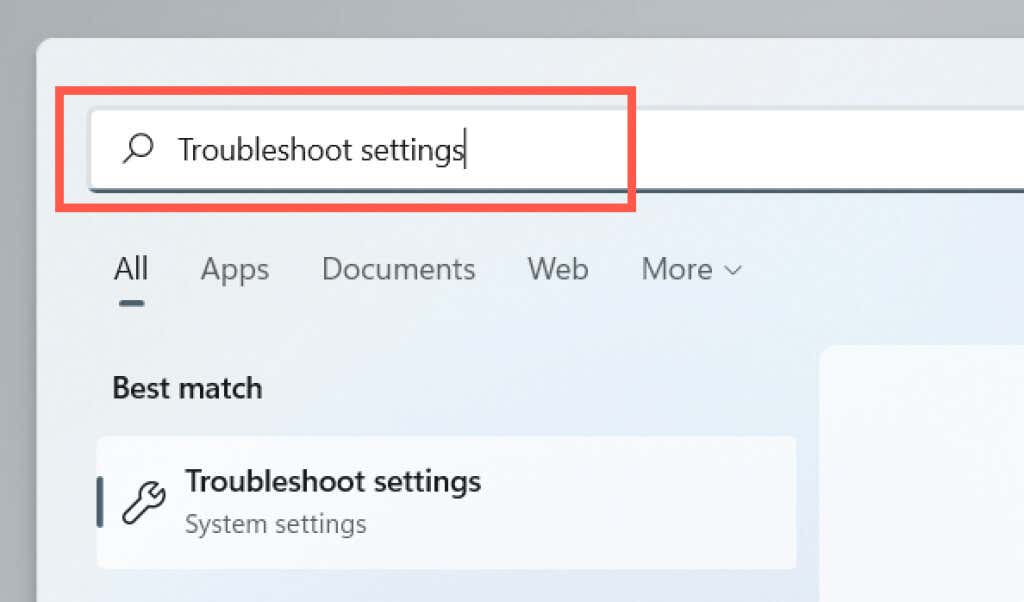
- Open the Start menu, type Troubleshoot settings and select Open.
- Select Other troubleshooters.
- Select Run next to Power.
3. Disable Fast Startup
Fast Startup speeds up your laptop when you turn it on, but it can also create conflicts with power management. Disable the feature and check if that makes a difference.
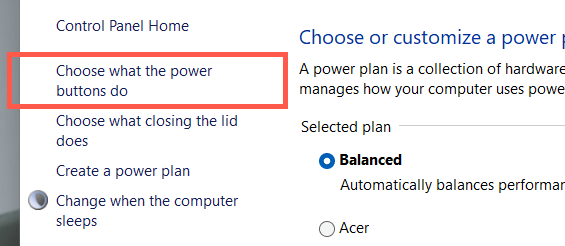
- Open the Power Options window and select Choose what the power buttons do.
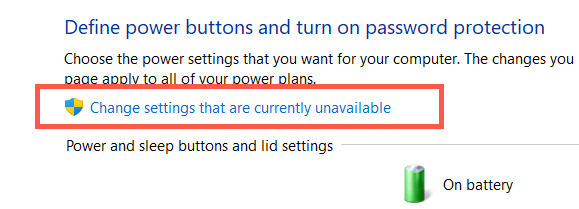
- Select Change settings that are currently unavailable.
- Scroll down and uncheck the box next to Turn on fast startup (recommended) > Save changes.
4. Reinstall Battery Driver
If the issue persists but only while attempting to use the laptop closed on battery power, use the Device Manager to reinstall the battery driver. Disconnect the power adapter before you begin.
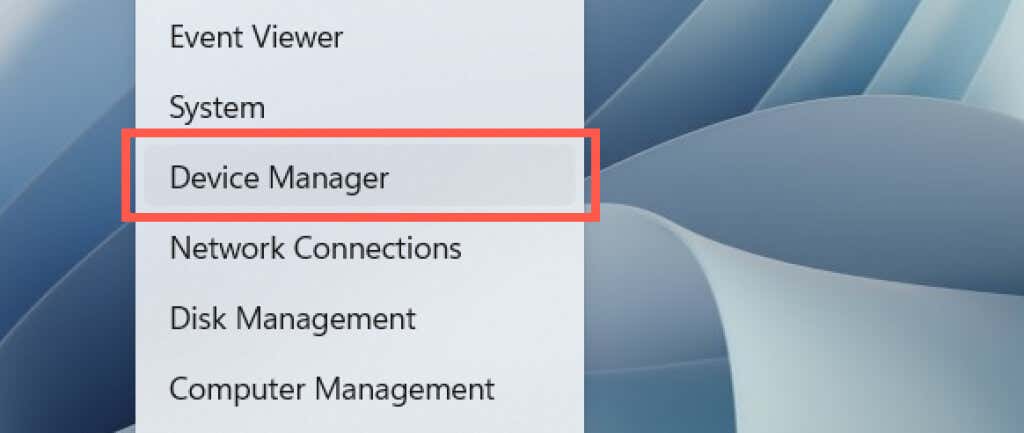
- Right-click the Start button and select Device Manager.
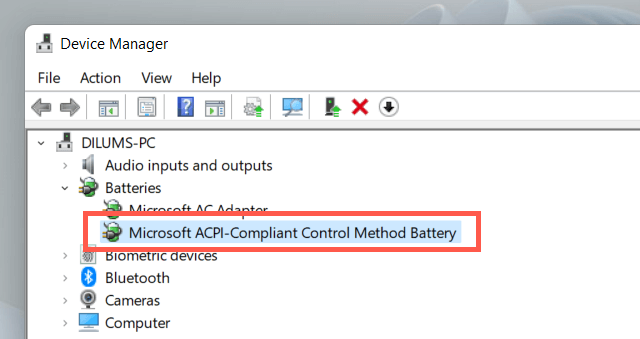
- Expand Batteries and select Microsoft ACPI-Compliant Control Method Battery.
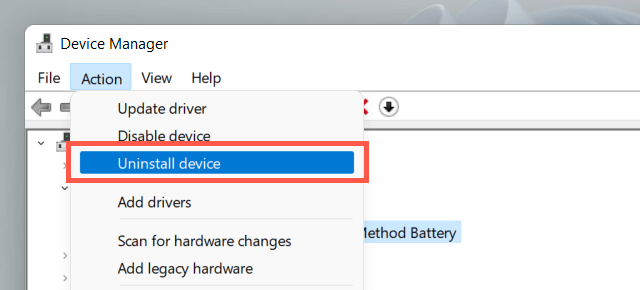
- Select Action > Uninstall device on the menu bar.
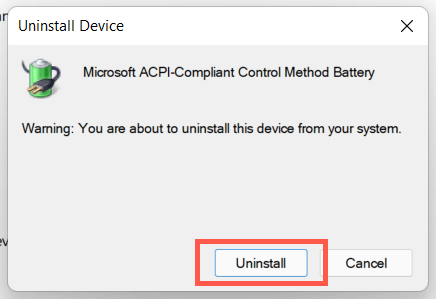
- Select Uninstall.
- Shut down your laptop. Then, reconnect the device to a power source and reboot it. The operating system will automatically reinstall the battery driver during startup.
5. Update Windows
The following fix involves checking for and applying any pending operating system updates.
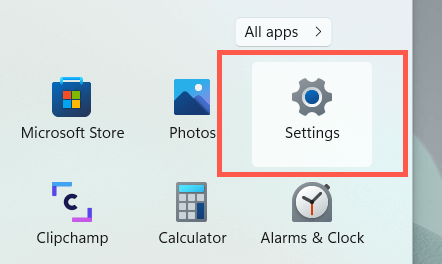
- Open the Start menu and select Settings.
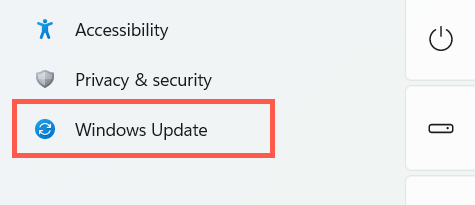
- Select Windows Update.
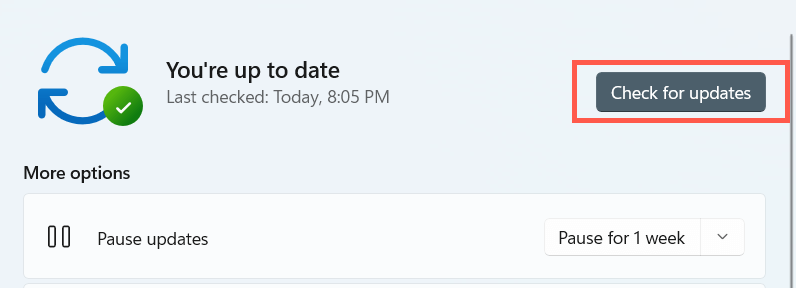
- Select Check for updates. If Windows Update detects any updates, select Download and Install to install them. Also, select Advanced options > Optional updates and install any hardware-related updates if available.
6. Run SFC and DISM
If your laptop continues to go to sleep when you close its lid, run the System File Checker and Deployment Image Servicing and Management command-line tools next.
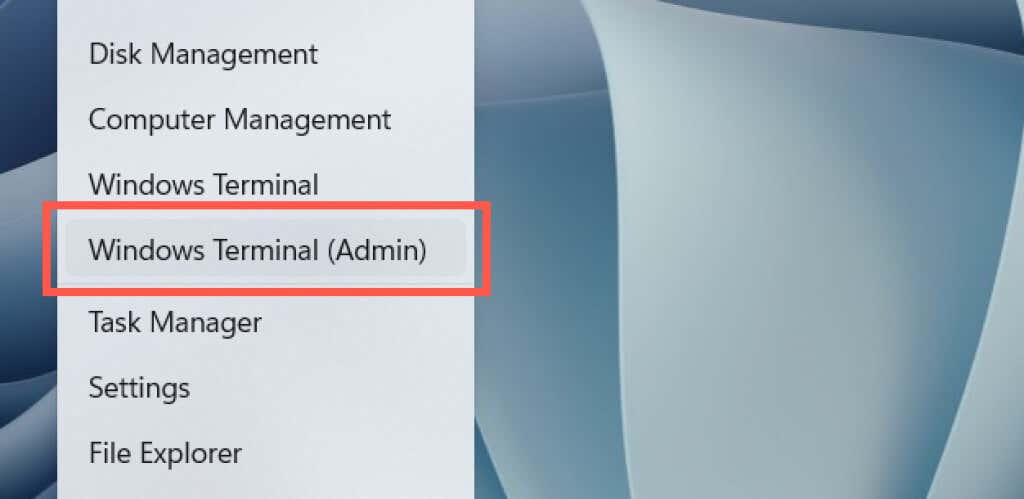
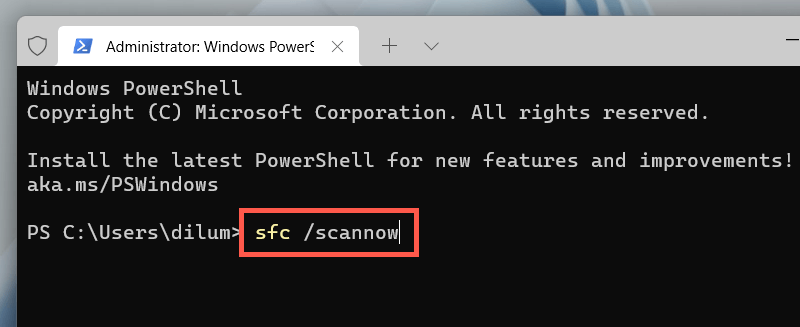
- Right-click the Start button and select Windows Terminal (Admin) or Windows PowerShell (Admin).
- Run the following command: sfc /scannow
- Run the following command next: DISM /Online /Cleanup-Image /RestoreHealth
7. Update Laptop Drivers
Updating the drivers for your laptop could also resolve firmware-related issues preventing you from using the device with its screen closed. Check the laptop manufacturer’s site—Dell, HP, Lenovo, etc.—for the latest drivers. Additionally, you might consider updating the BIOS or UEFI for your laptop.
