In most cases, running the Windows Network Diagnostics tool should fix any issues with your network connection. If it doesn’t work, you’ll need to open a Windows command line or PowerShell window and follow these instructions. You should also double-check your network devices are working correctly, too.
Run The Windows Network Diagnostics Tool
From time to time, your PC will run into issues with your network connection. The Windows Network Diagnostics tool exists to help you resolve most of these issues automatically.
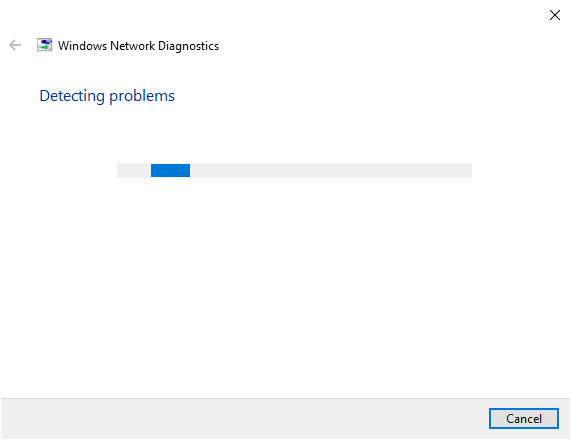
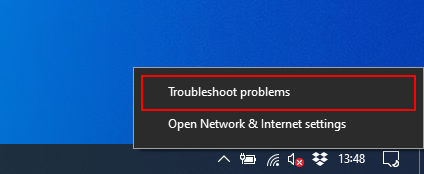
To run the Windows Network Diagnostics tool, right-click on your network icon in the Windows taskbar. Click Network Problems to begin.
Windows will make an initial scan of your network configuration and devices to check whether it can automatically identify any potential problems. If it can, it’ll inform you of the problem and ask you whether to automatically fix it or not. Windows will likely diagnose the cause of a ‘cannot renew IP address’ error at this stage. Allow Windows to automatically fix the problem and, if it can’t, try another method instead.
Release & Renew Your IP Address
When you’re connected to a network, your PC is usually issued an IP address for a limited amount of time by your router. These IP “leases”, as they’re called, will last for up to 24 hours at a time. Most of the time, your network router will assign this same IP address again and again but, occasionally, conflicts can occur. The IP address might be assigned to another device by accident or your network adapter may struggle to complete the IP lease renewal process due to a bad configuration or hardware issue. If your Windows machine displays the ‘cannot renew IP address’ error, and the Windows Network Diagnostics tool can’t fix the problem, you should attempt to release and renew your IP address lease automatically using the ipconfig tool.
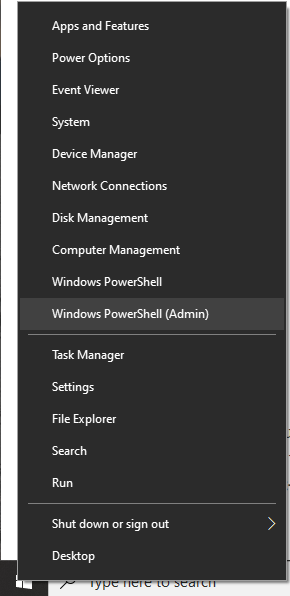
Open up a Windows PowerShell window to begin. To do that, right-click your Windows Start menu button on the taskbar, then click Windows PowerShell (Admin). You can also perform these actions using the older Windows command line.If your menu is showing the Command Prompt, read out previous post on how to switch the menu items to PowerShell.
To see a list of your current network configuration details, type ipconfig /all.
To release your IP address, type ipconfig /release. This will release your network adapters from any assigned IP addresses.
Once your network adapters are released, type ipconfg /renew to assign new IP address leases.
Forcefully releasing and renewing IP leases should resolve an IP address error in most cases but, if it doesn’t, you’ll need to look at more drastic options like resetting your Windows network configuration.
Reset Your Windows Network Configuration
If you’re still having trouble with your network connection, resetting your network settings can resolve the issue. You can do this from a command line or Windows PowerShell window.
Right-click your Windows Start menu button on the taskbar, then click Windows PowerShell (Admin) to open a PowerShell window. You can use the older Windows command line if you’d prefer.
Winsock is a part of the Windows network infrastructure, designed to help Windows PCs and the software running on them to communicate over standard networks. Your Winsock settings can sometimes be corrupted accidentally by antivirus software or maliciously by malware. Resetting your Winsock settings can resolve this.
At the Windows PowerShell or command line, type netsh winsock reset. You’ll be asked to restart your PC once the process is complete.
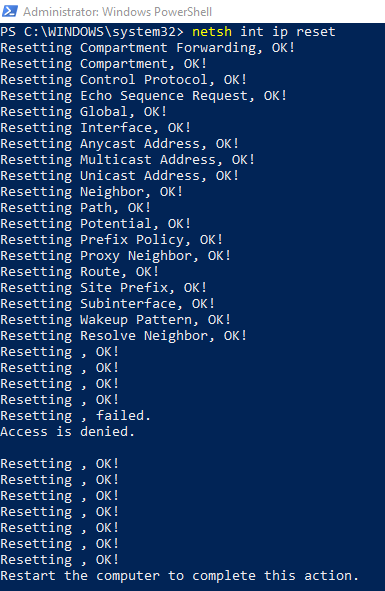
The netsh (network shell) tool is the low-level administration tool for network commands on Windows. You can use this to reset your TCP/IP settings. This can resolve the ‘cannot resolve IP address’ issue by removing any conflicting settings or connections.
Type netsh int ip reset to reset your TCP/IP settings. Once completed, restart your PC to finish the process.
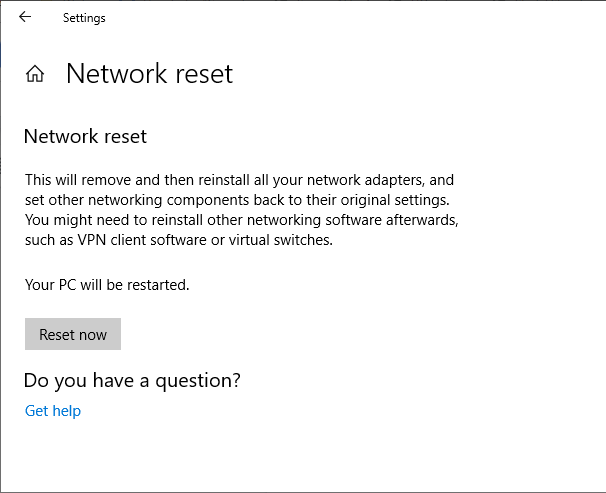
Finally, you can perform a full network reset from the Windows network settings menu. This will completely wipe all of your network configuration settings. If, for instance, you’ve set your network adapter to use a static IP address, this will remove those settings and reset your adapter to use Windows’ default settings instead.
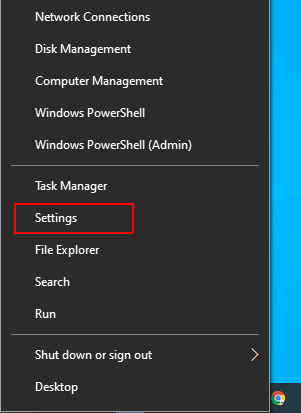
Open your Windows settings menu. To do this, right-click the Windows Start menu button on your taskbar, then click Settings.
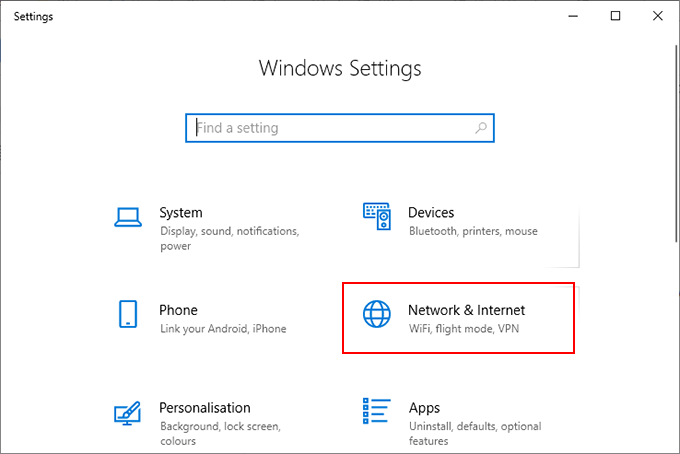
Click Network & Internet to enter your Windows network settings menu.
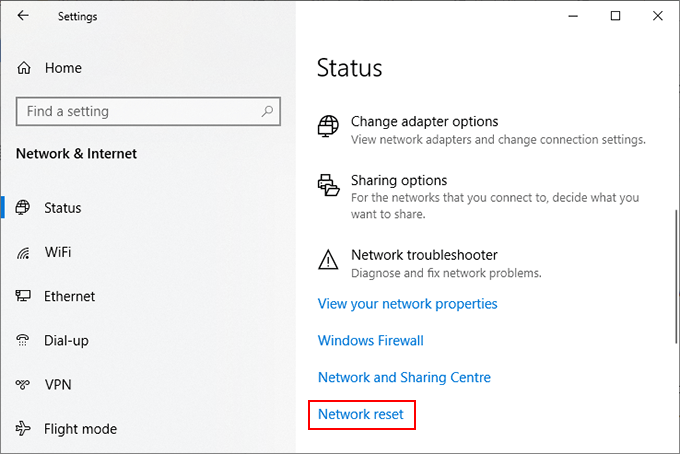
Click Status from the left-hand menu. From here, scroll to the Change your network settings category, then click Network reset.
In the Network Reset menu, click the Reset Now button.
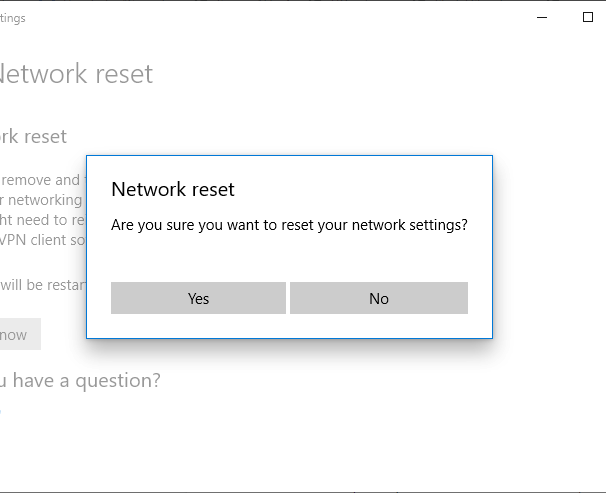
Windows will ask you if you want to proceed with the network reset. Click Yes to begin the process. Windows will reset your network configuration completely and restart your PC once the process has finished.
Resetting your network configuration using the above methods exhausts the options for resolving a ‘cannot renew IP address’ issue on Windows itself. If the problem persists, the cause is likely due to a problem with your network devices.
Troubleshoot Your Network Devices
If you’re unable to resolve issues with your network connection on Windows, troubleshoot your network devices instead. If you’re on a wired network, double-check your wired connections. Check that your ethernet cables are connected correctly and if they are, switch out the cables. Try another network adapter to double-check whether you’re able to make a connection to your network. If that fails, connect to an alternative network to see whether the fault is due to an issue with your network router instead.
