If your Xbox One or Xbox Series X refuses to launch a game, has trouble loading files, or just experiences issues that standard troubleshooting won’t solve, try a factory reset. You should also use a factory reset to fully erase the system before you sell it to another person to ensure the safety of your personal information.
How to Factory Reset an Xbox One or Xbox Series X
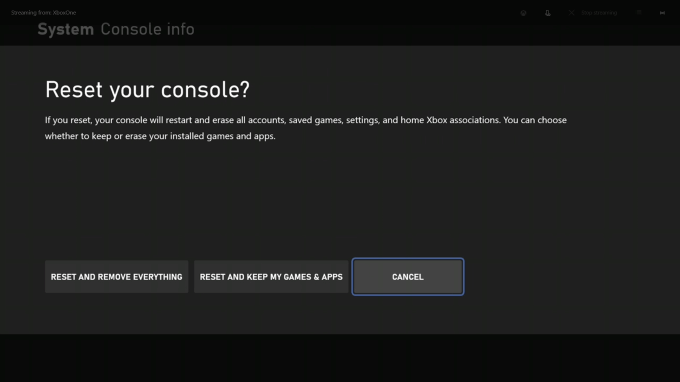
Factory resetting an Xbox One or Xbox Series X follows the same steps regardless of what console you have. After you select Reset console, you will be presented with three options.
Reset and remove everything: Choosing this setting completely wipes the Xbox clean of all data, including your profiles, game installs, and more. This is the actual factory reset. You should only choose this option when you are getting rid of your console or as a last resort when troubleshooting problems.Reset and keep my games & apps: This option is the best choice when troubleshooting problems with your Xbox. It resets the operating system, clears the cache, and deletes corrupt data without removing games and apps. If you begin to experience many weird issues with your console, this option is one of the best fixes.Cancel: If you choose not to reset the console, select this option. It backs you out to the main menu with no damage done.
Be aware that the Xbox does not ask you to confirm your choice, nor request a password to go through with the reset. Once you select your choice, the system carries it out and you can’t stop it.
How to Factory Reset an Xbox Through USB
If your Xbox has more serious issues and you can’t get it to load, you can perform a reset by loading a specific file onto a USB drive and plugging it into the console. You will need a couple of things to get started:
A Windows PCA USB drive with at least 4 GB of storage, formatted to NTFS.
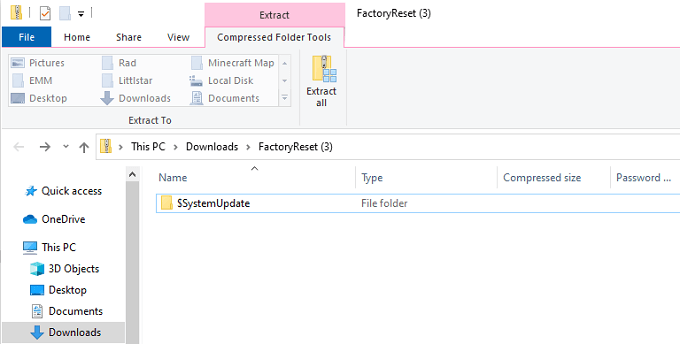
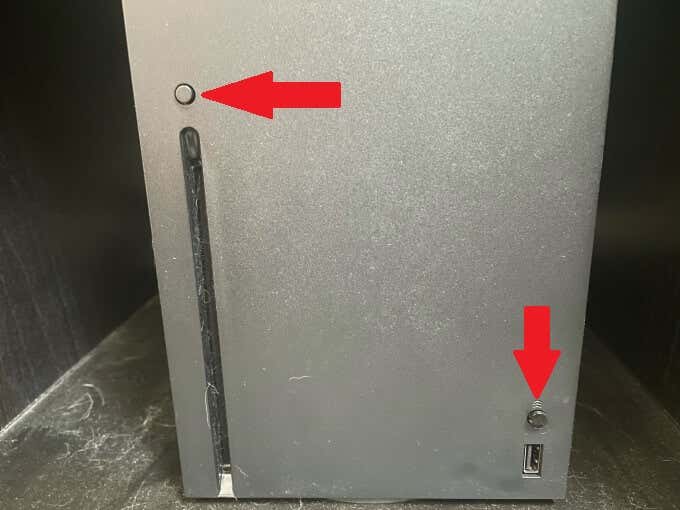
If you aren’t sure how to format your USB drive, don’t worry — we have an entire guide available. After you’ve formatted the drive, navigate to https://www.xbox.com/xboxone/restorefactorydefaults. This link downloads the necessary file to your system as a ZIP folder. Unzip the folder. Inside you will find a file named $SystemUpdate. Copy that file onto the root directory of your flash drive, and then remove the drive from your PC. Note that there should be no other files on the drive; it should be empty except for $SystemUpdate. The next step involves your Xbox itself. Note: If you have an all-digital console that does not have an eject button, you only need to hold the Pair button. If the process is successful, you will see the digital experience guide on-screen. It will guide you through the steps to complete the reset of your console. Be aware that the console restart process can take several minutes, requiring an internet connection. Reconnect the Ethernet cable after it starts up.
About Startup Tones
Listening for the startup tones isn’t just a necessary step but an informative one. The sounds your Xbox makes as it boots up indicate vital information regarding the process. In the above process, the first tone should happen about 10 seconds after you power the console up for the second time. That first tone indicates that a USB update has been detected. The second tone indicates that the file has been copied and mounted. The reason this doesn’t happen all the time is that the Xbox does not typically look for a USB update unless prompted. Holding down the Pair and Eject buttons tells the system to look for the update. If you do not hear these two tones, it means that something has gone wrong with the update and you may need to repeat the process. Please note: Resetting your Xbox through USB is a total factory reset. No data on the Xbox One or Series X will remain. No one wants to resort to a full factory reset, but it’s sometimes necessary when troubleshooting errors. The first step should be to reset the console and preserve the games, though. While it will take you through the initial setup process once more and request you log back into Xbox Live, don’t worry — your games and data will still be there.
