In this tutorial, we’ll discuss six methods you can use to create a Windows 11 local account and how to give them admin permissions.
What Is a Local User Account?
Local user accounts allow Windows 11 (and Windows 10) users to create separate accounts on the same device. Their primary purpose is to enable different users to use the same machine with their own settings and without having access to other users’ files. Local user accounts also allow you to use multiple accounts to utilize different settings for different purposes. For example, you can have an account for your personal files and another for work files. Finally, local user accounts have the benefit of being more private, as none of your data is required to be transmitted to a server. They also do not need an internet connection or email address to set up.
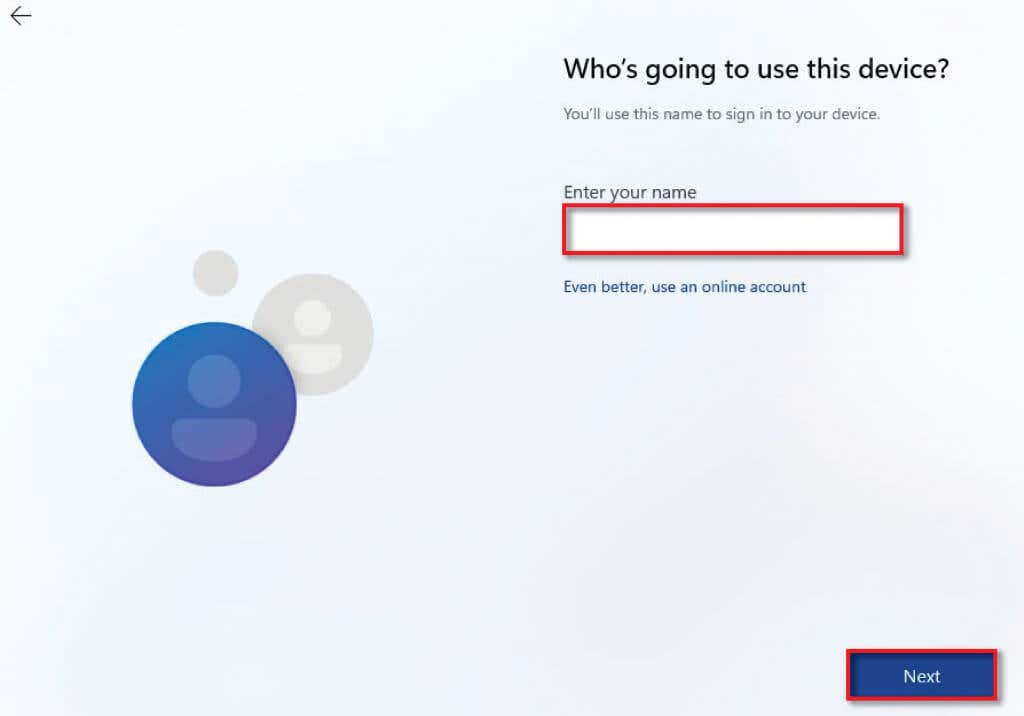
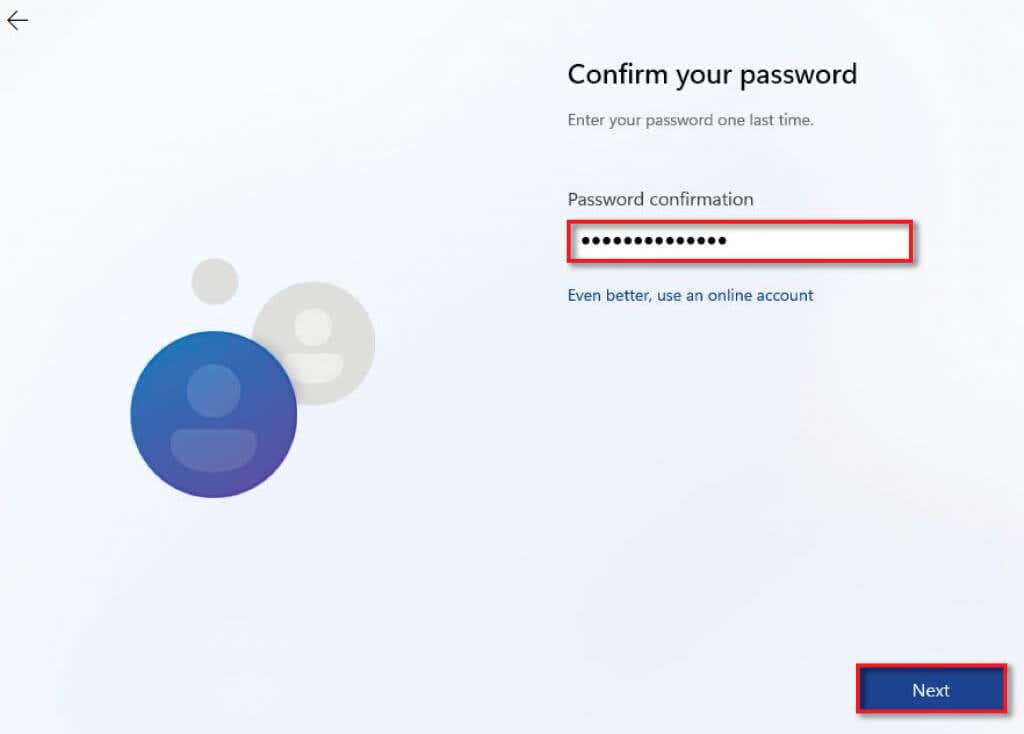
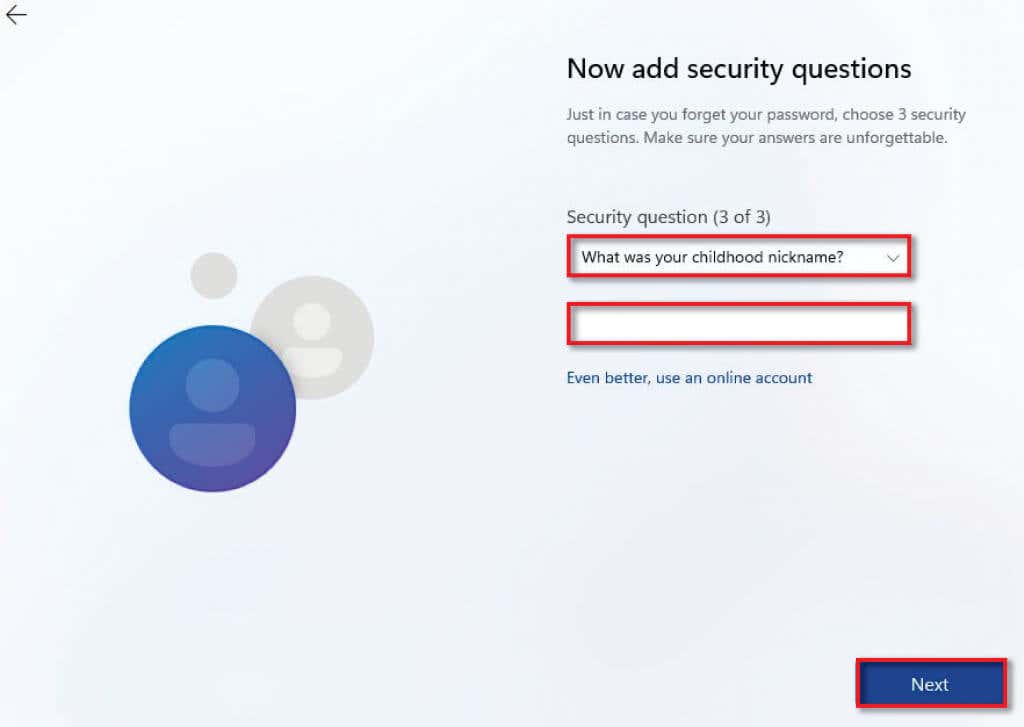
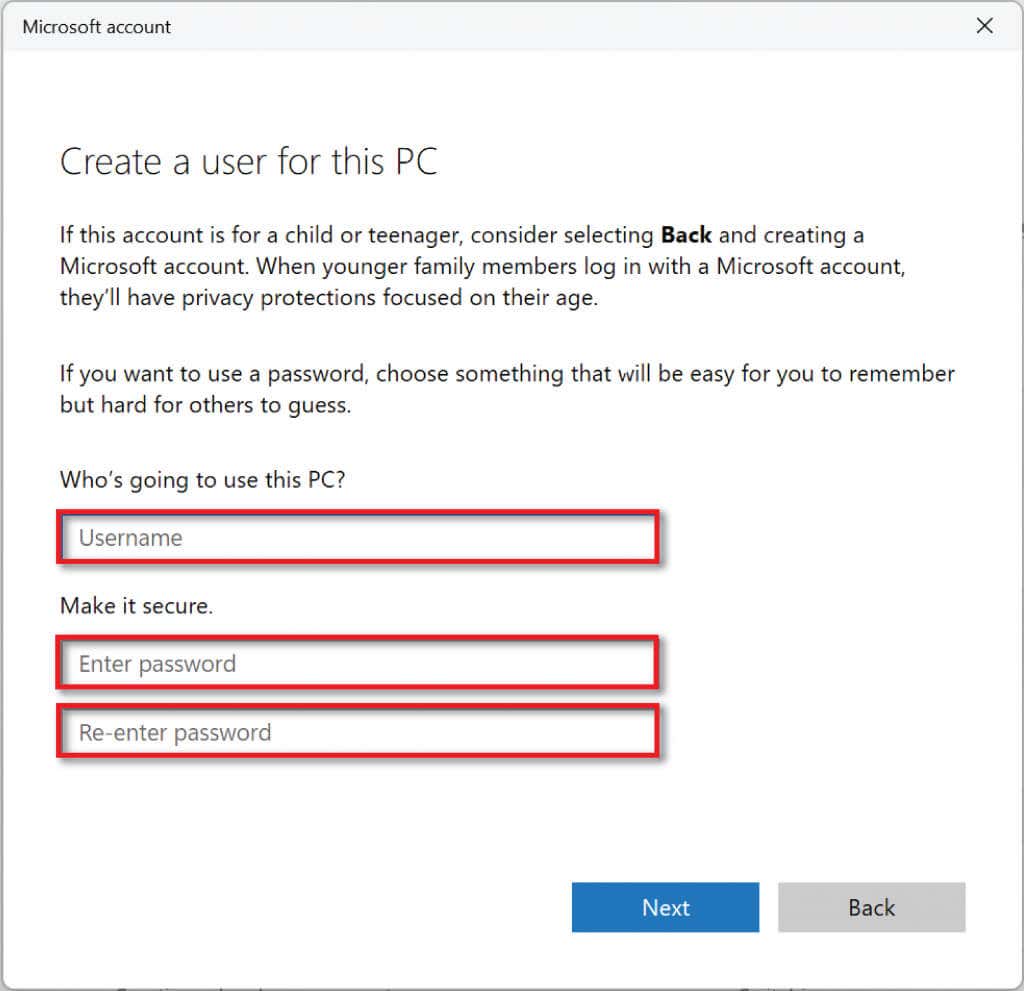
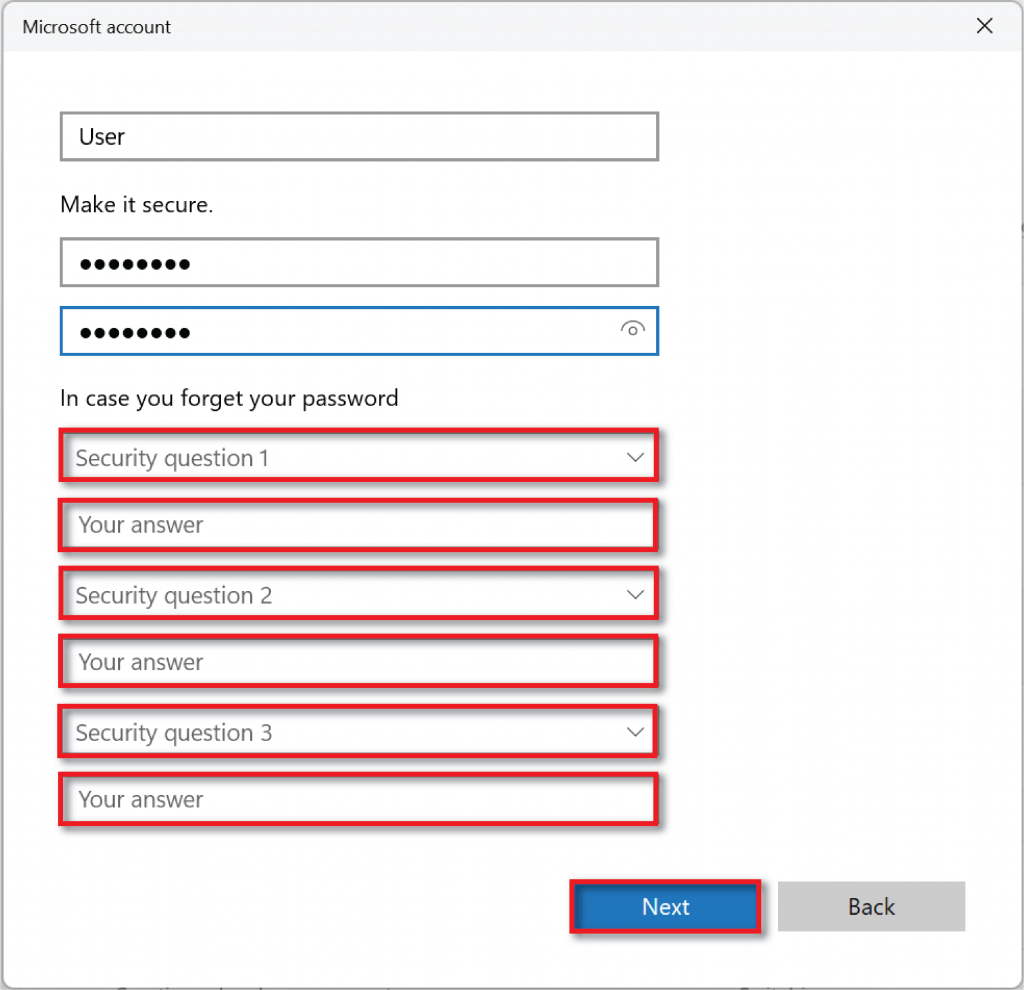
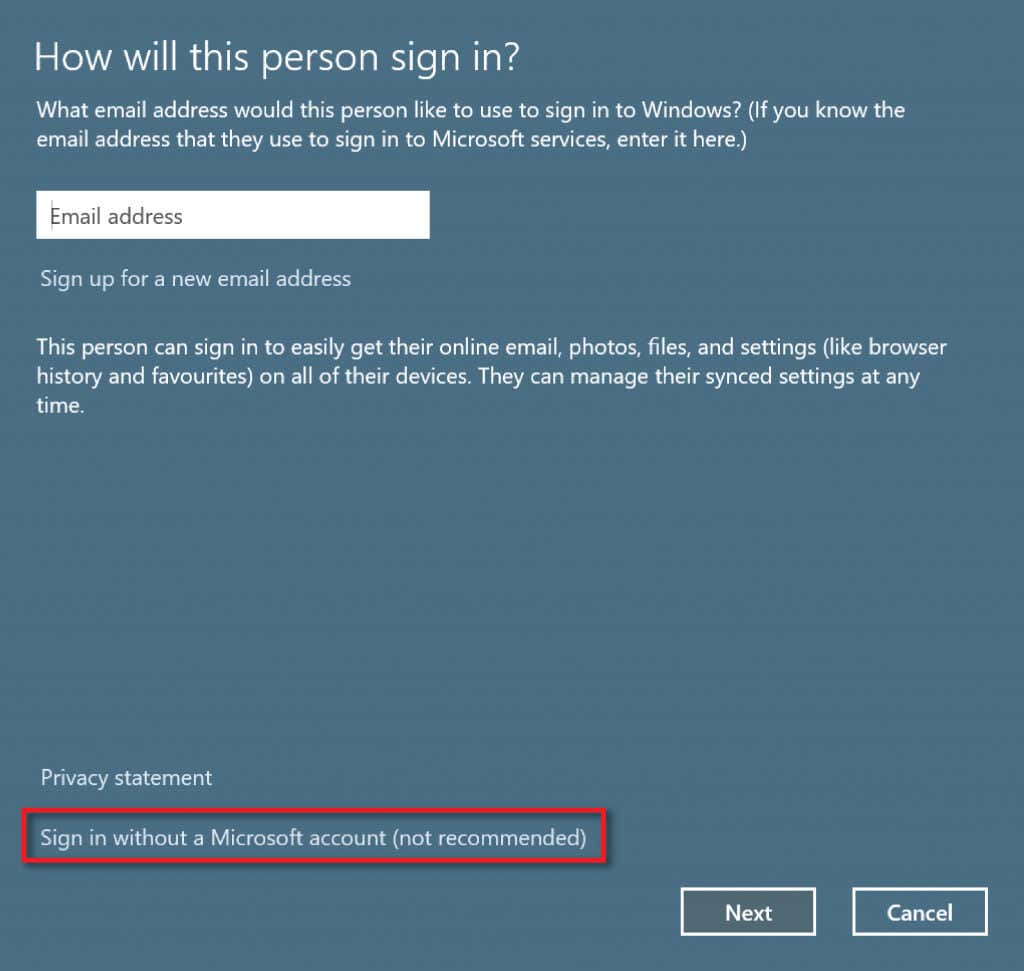
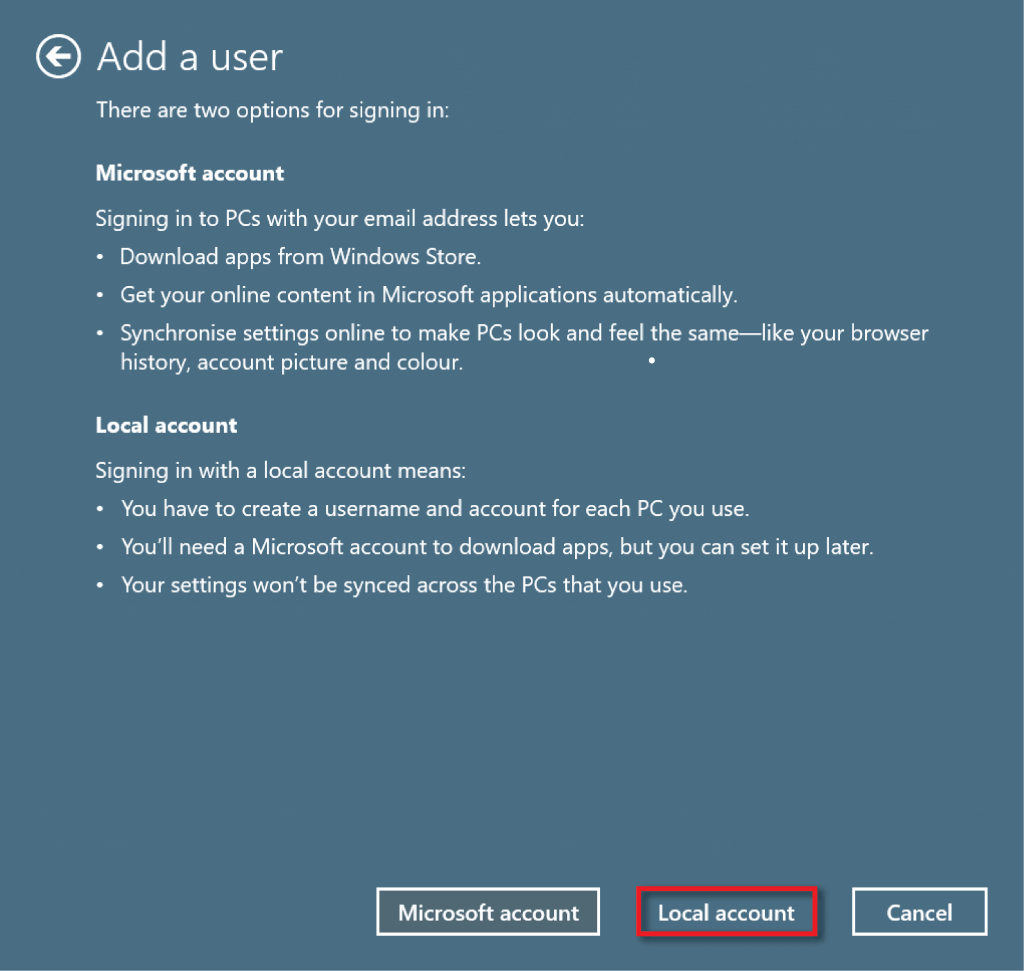
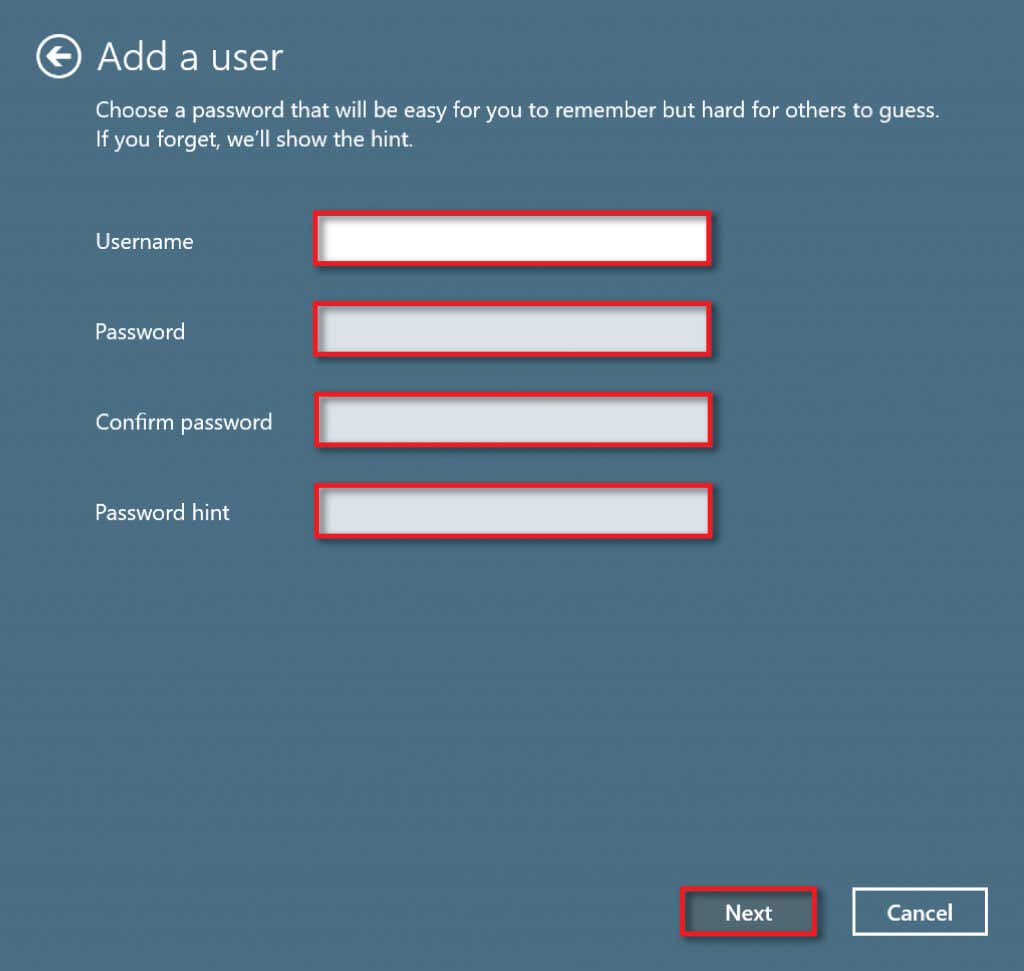
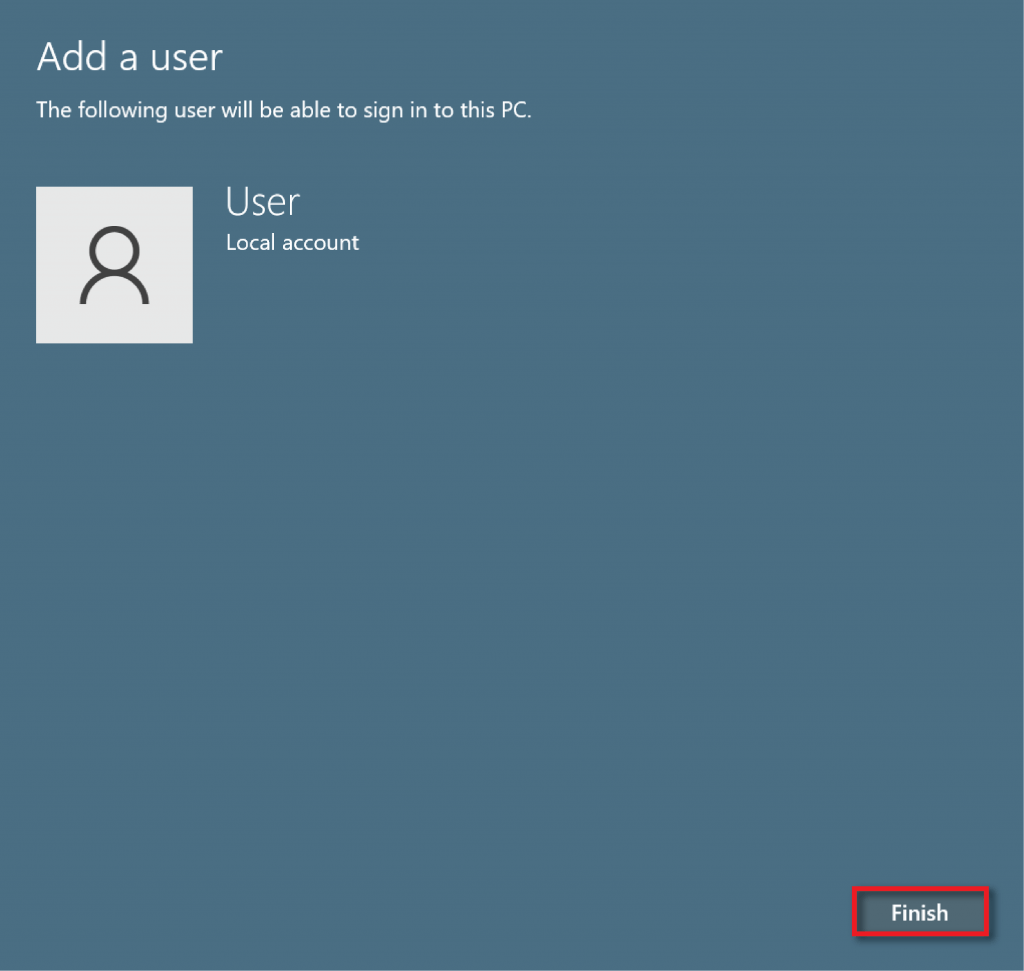
1. Create a Local User Account Using Windows 11 Setup
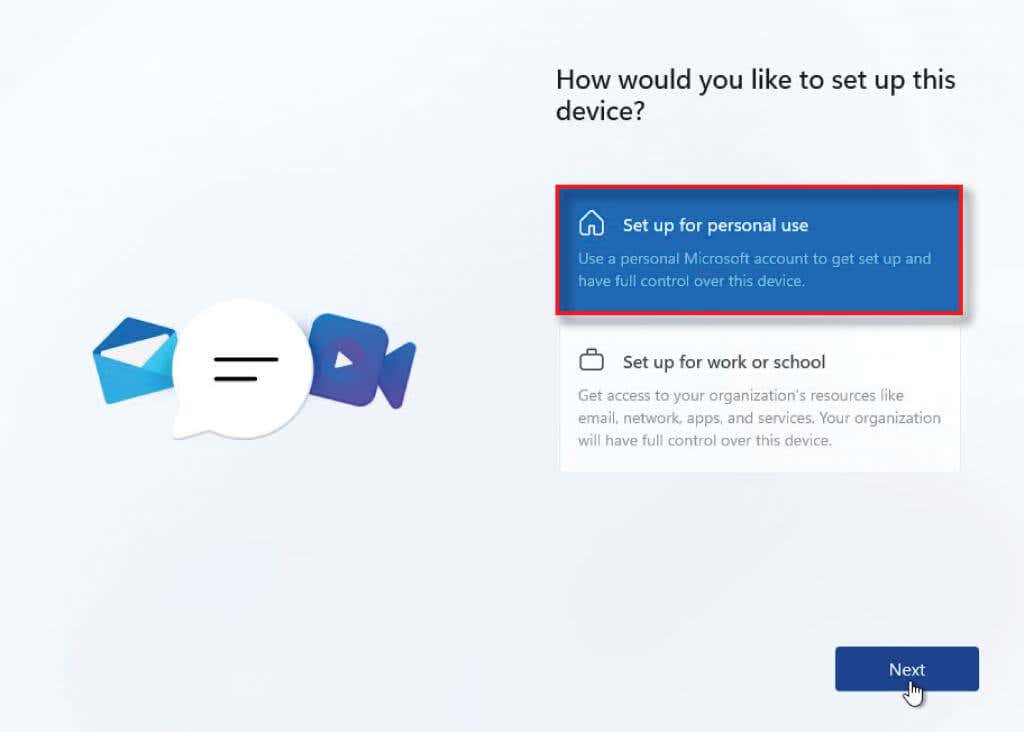
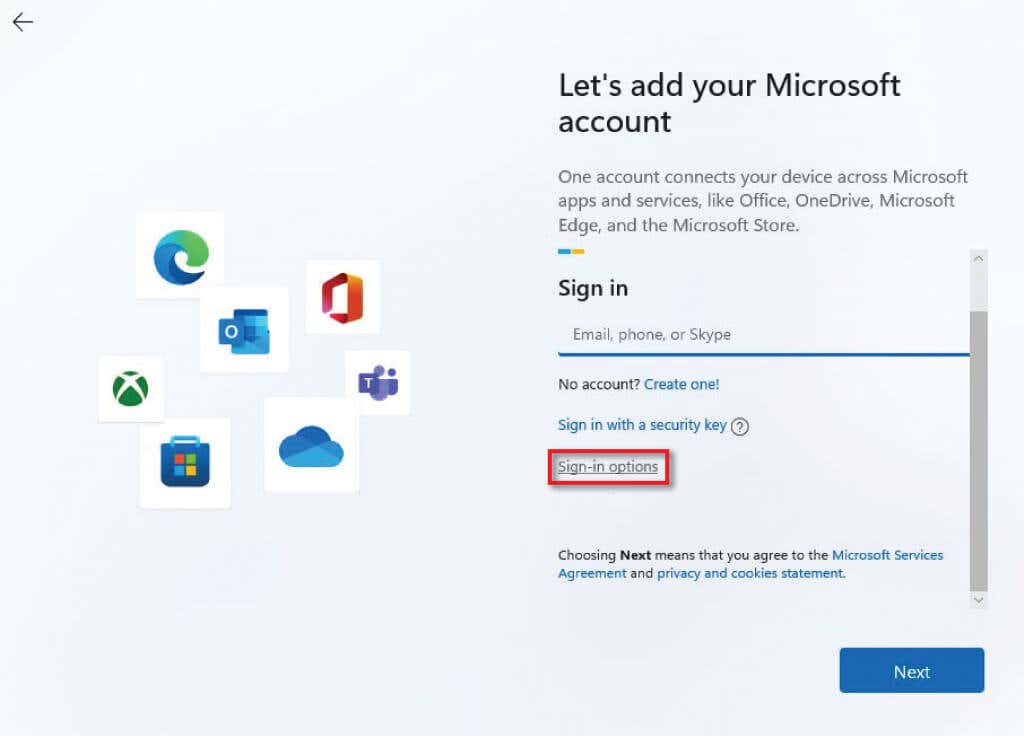
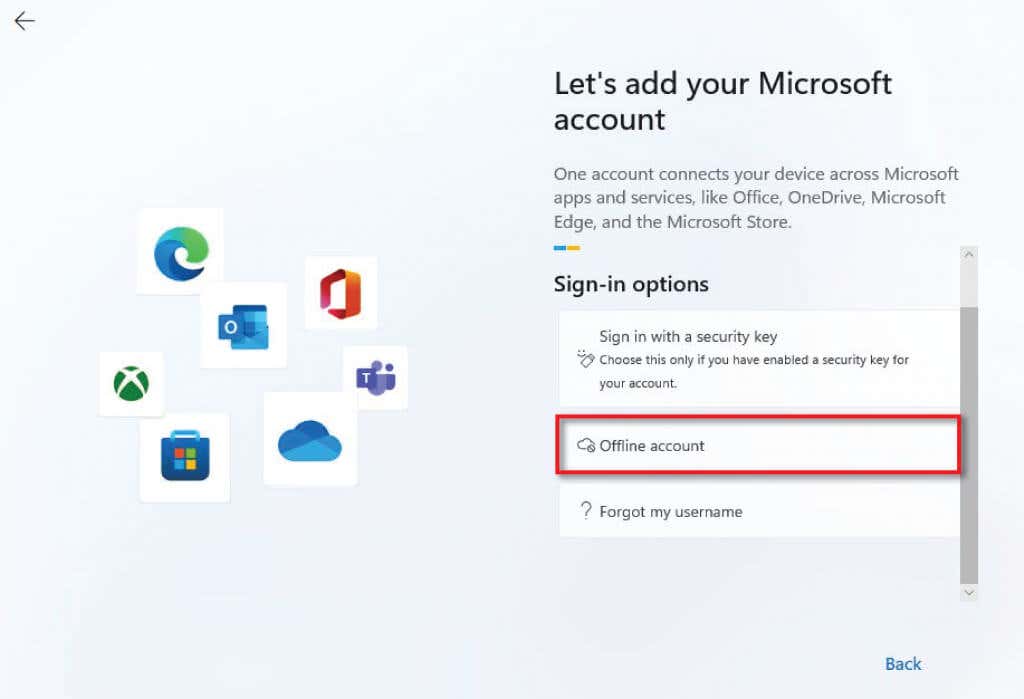
If you are in the process of Windows 11 activation for the first time, you can create a local user account instead of using your Microsoft account.
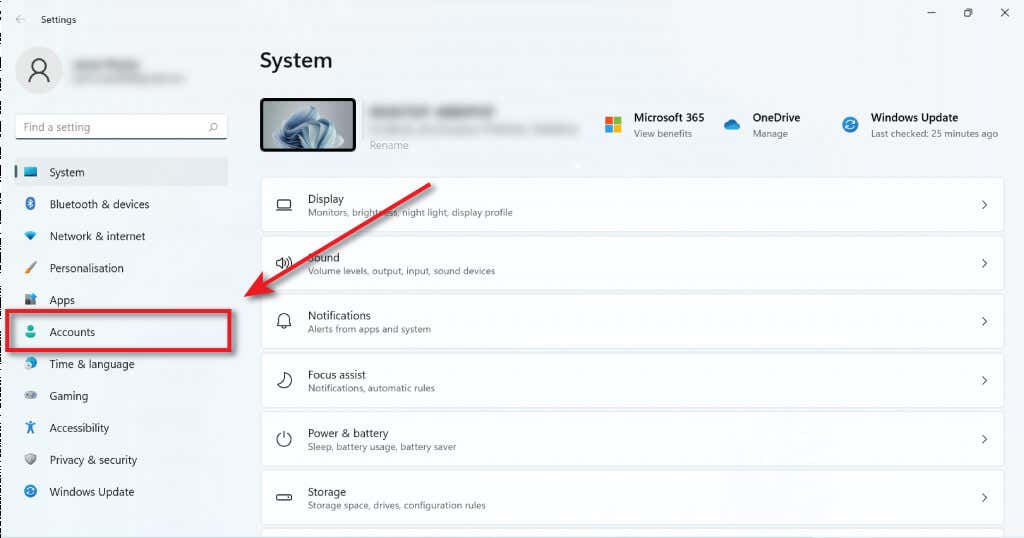
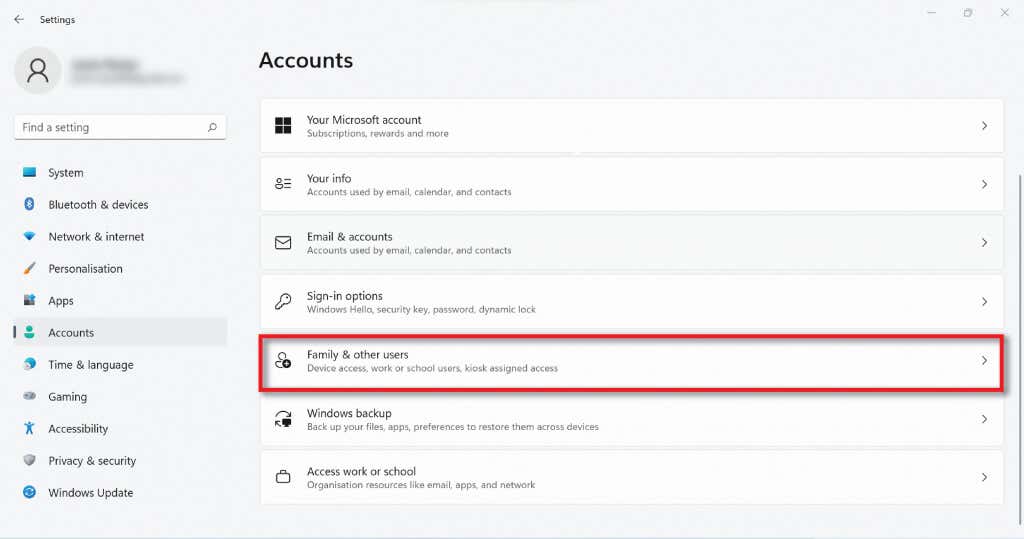
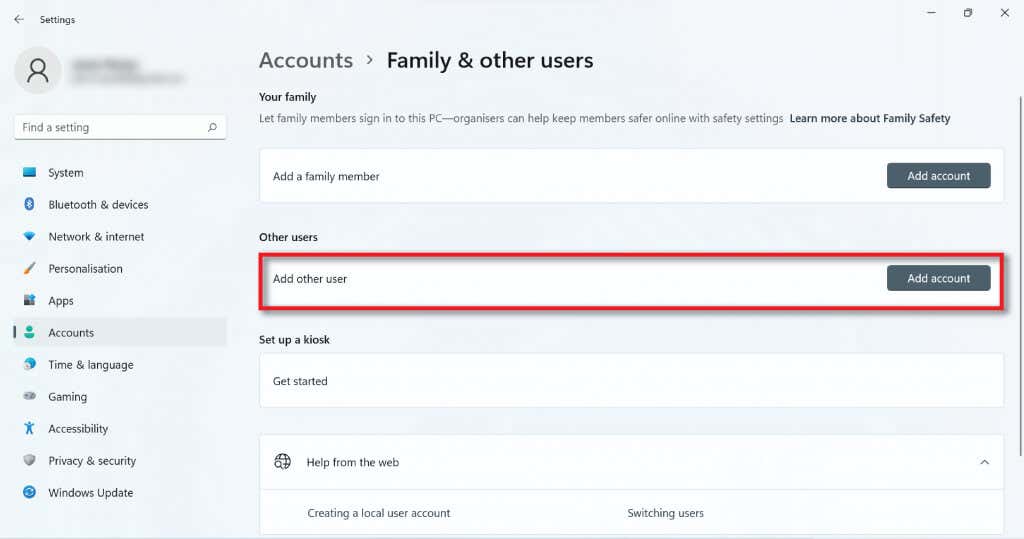
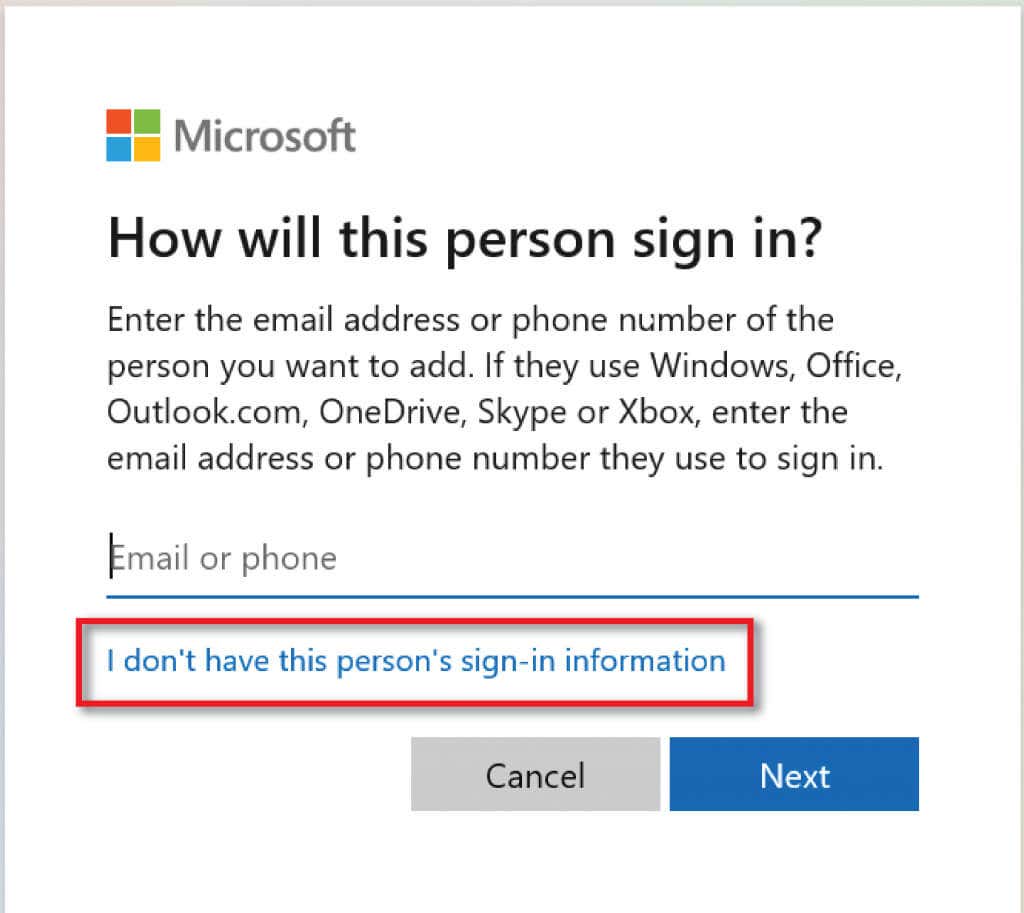
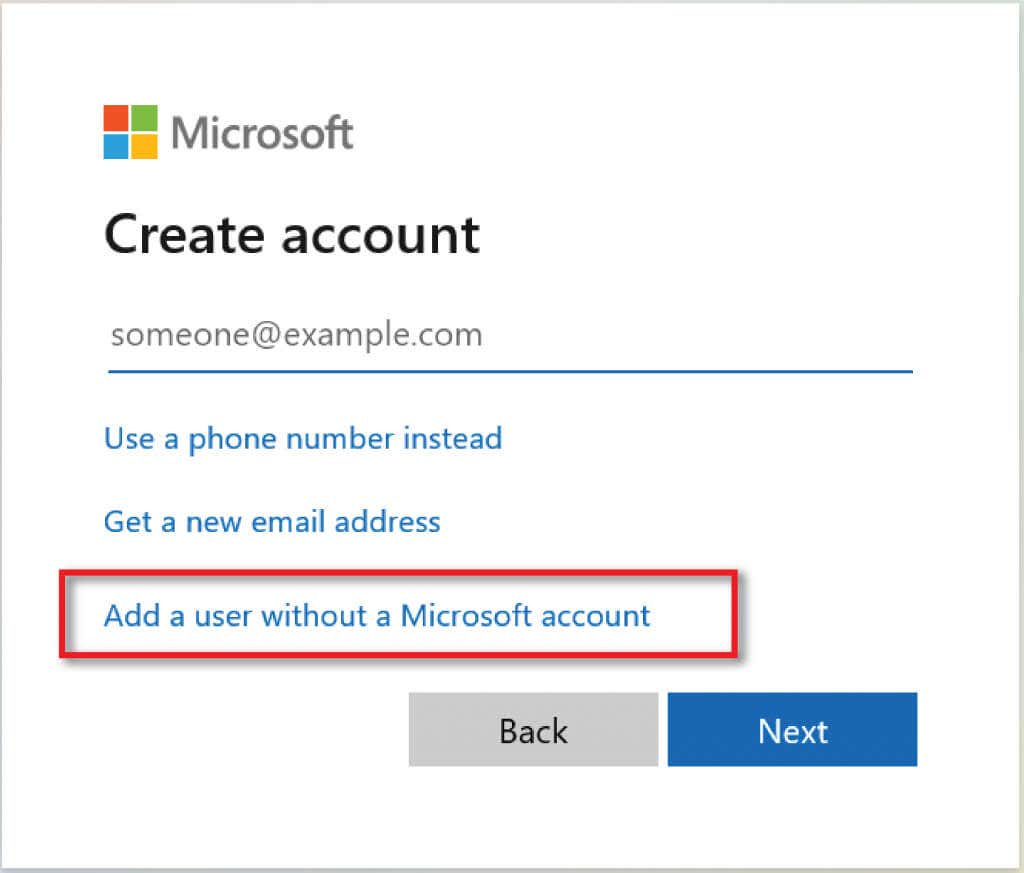
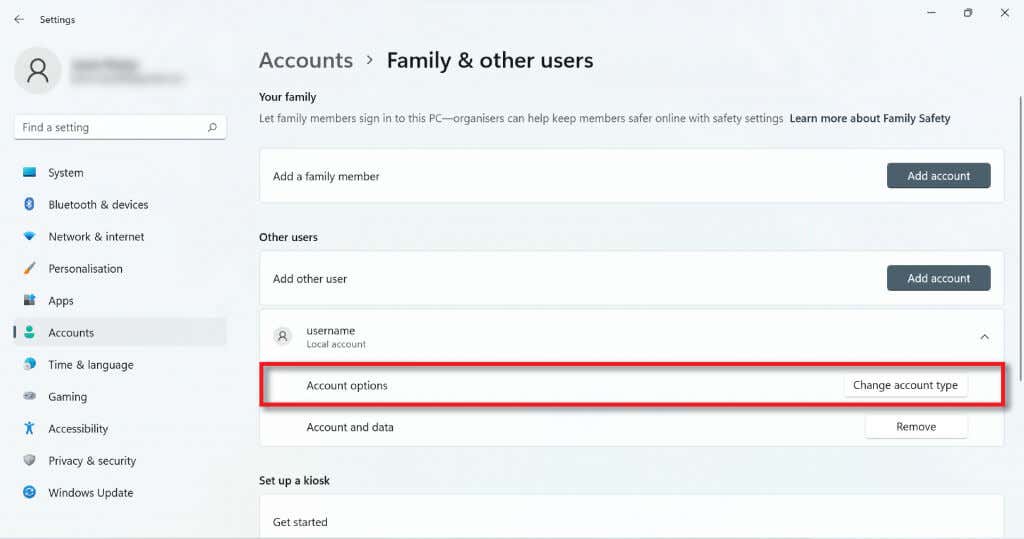
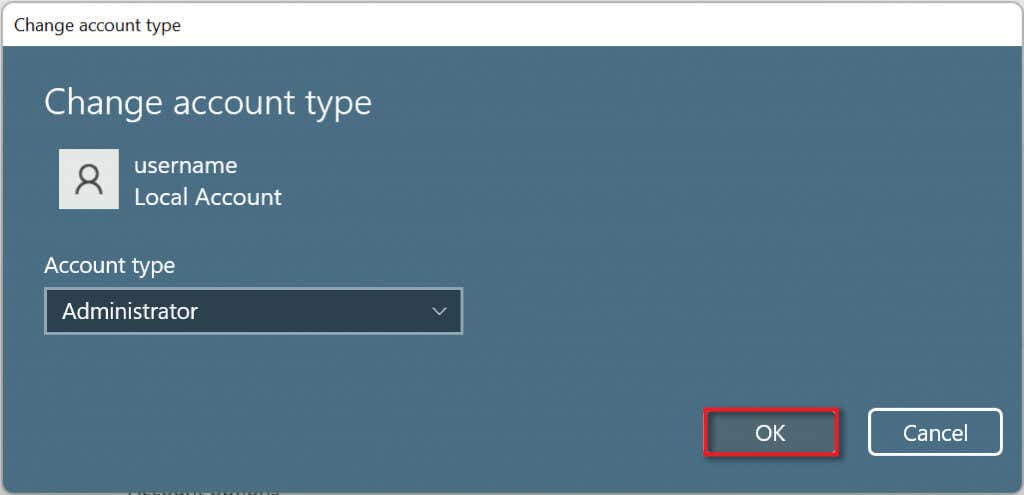
2. Use Windows Settings to Create a Local Account
If you’ve already set up your PC, you can create local user accounts via the Windows settings.
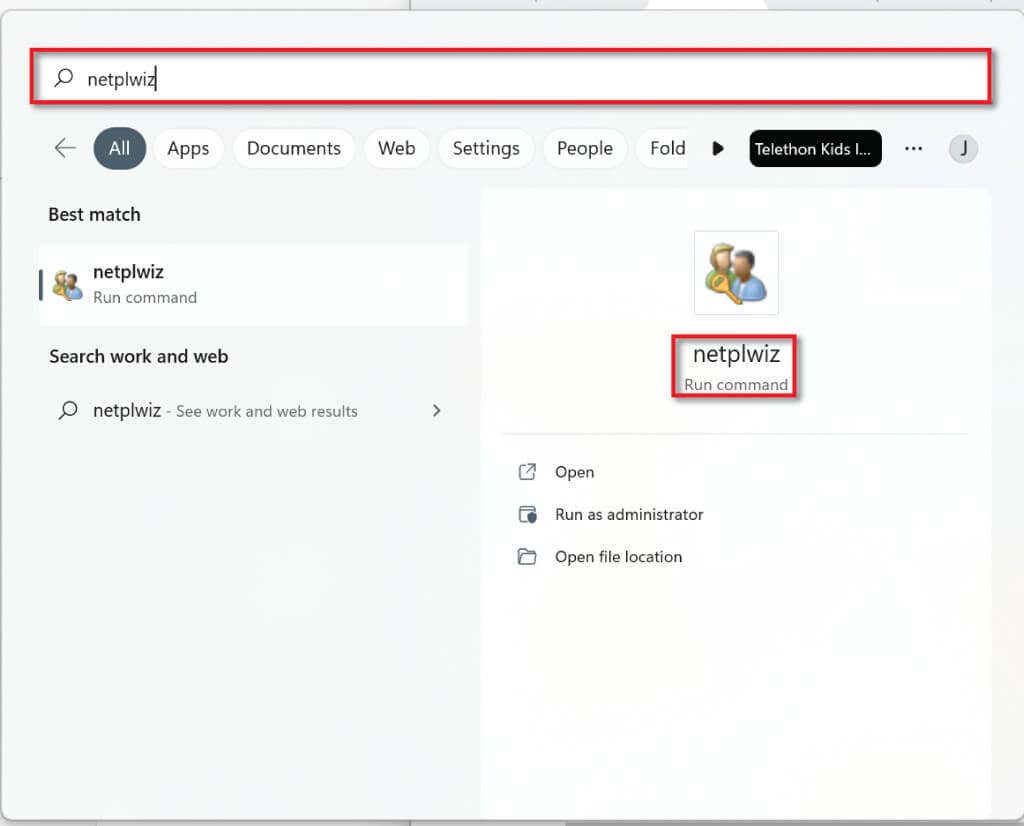
3. Use Netplwiz to create a Local User Account
You can also use Netplwiz to create a local user account. To do so:
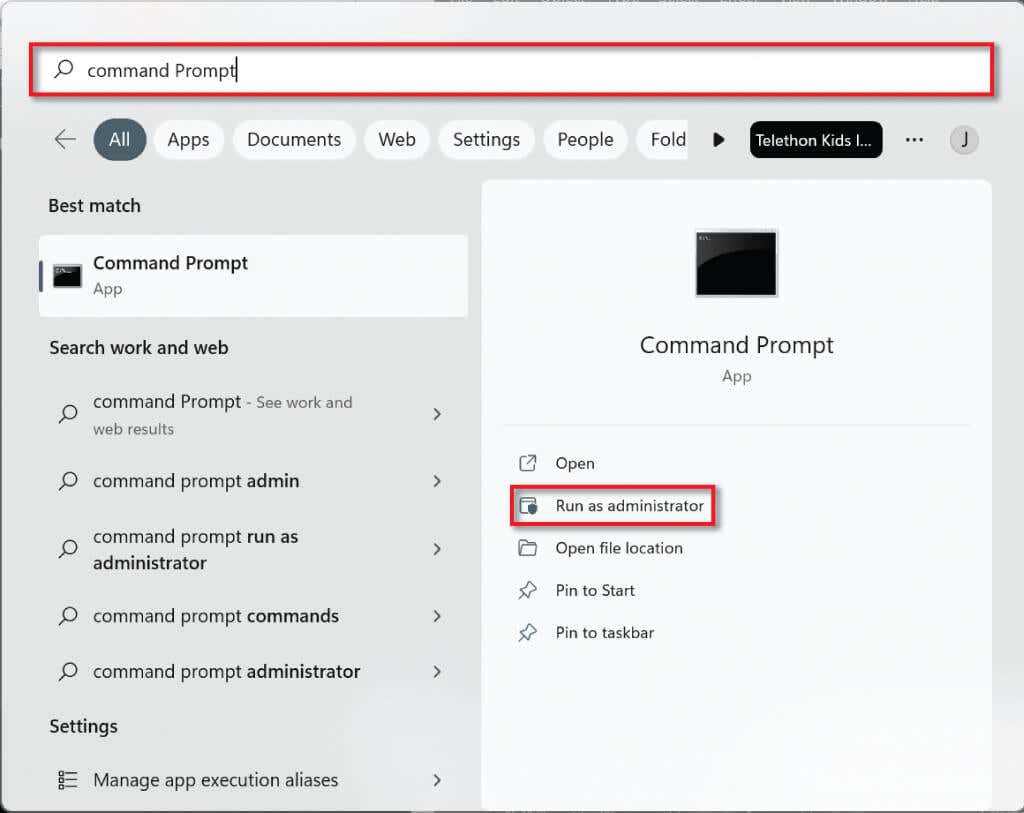
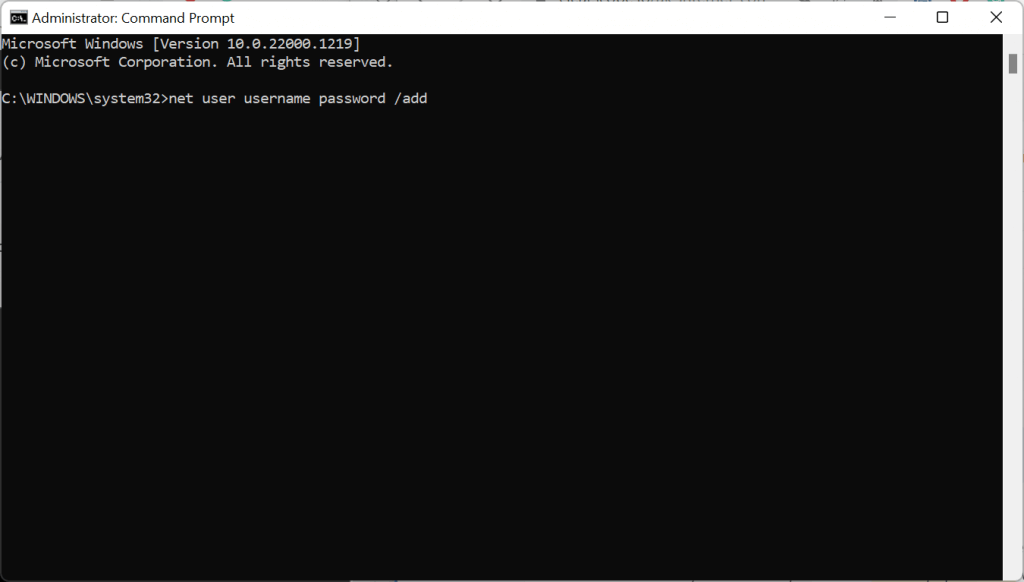
4. Use the Command Prompt to Create a Local User Account
To create a local account using Command Prompt:
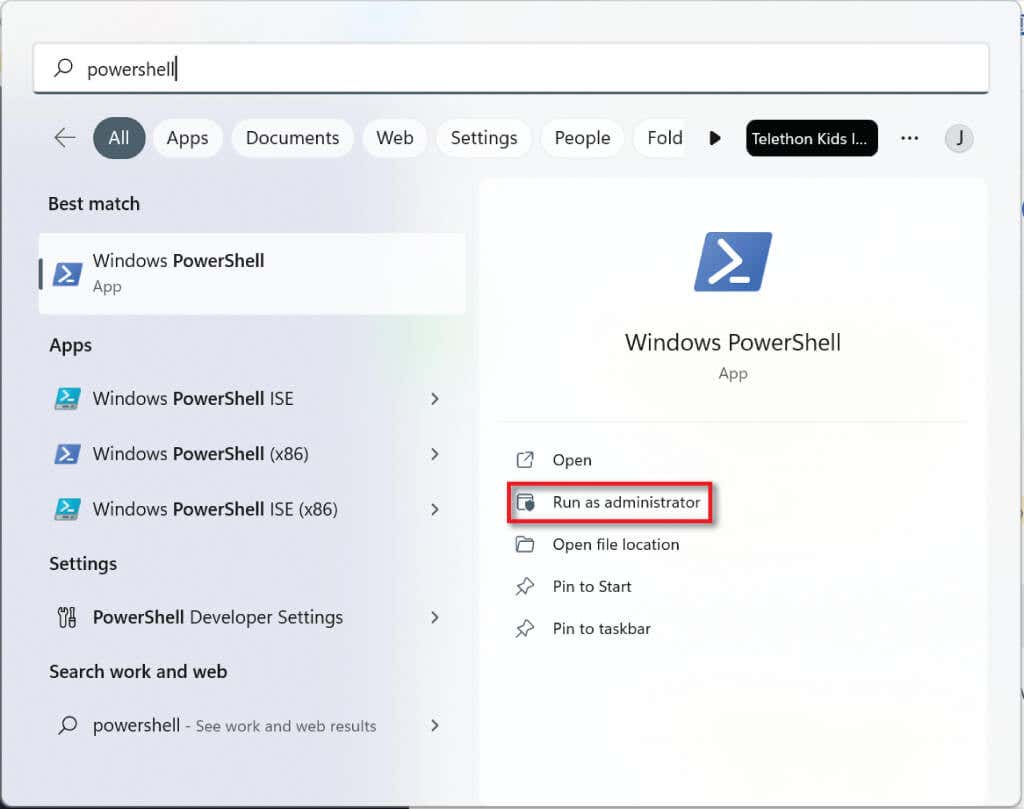
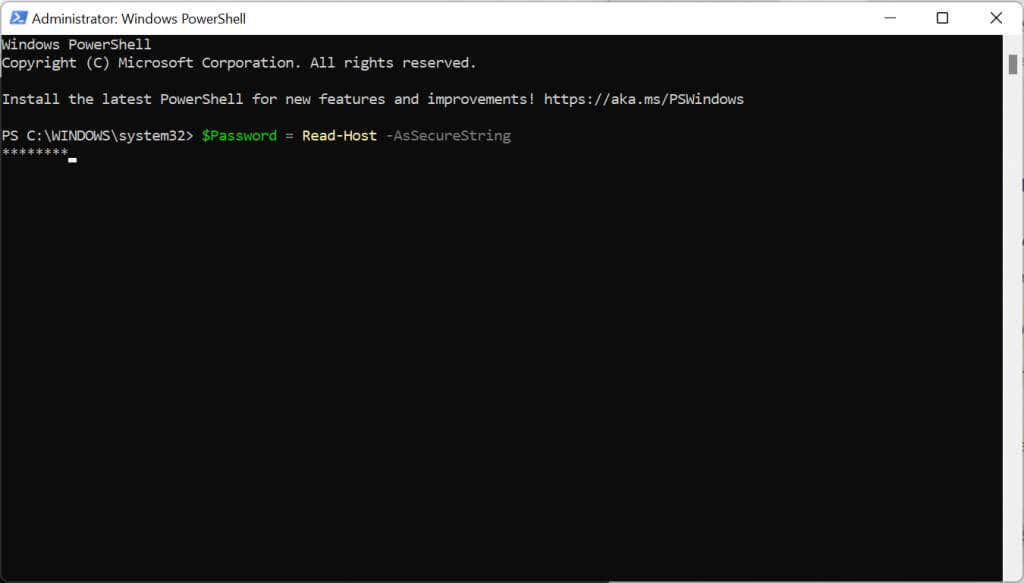
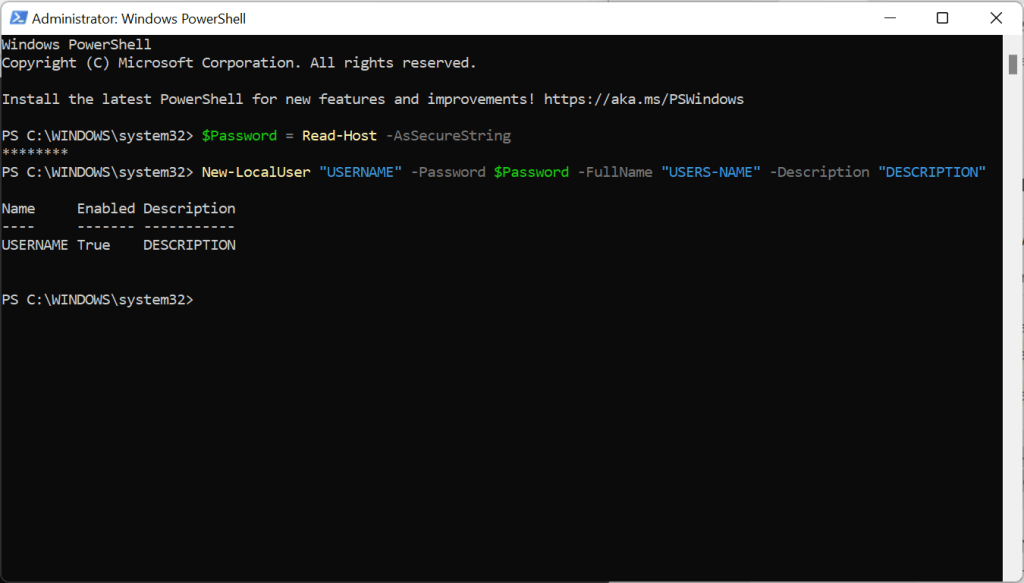
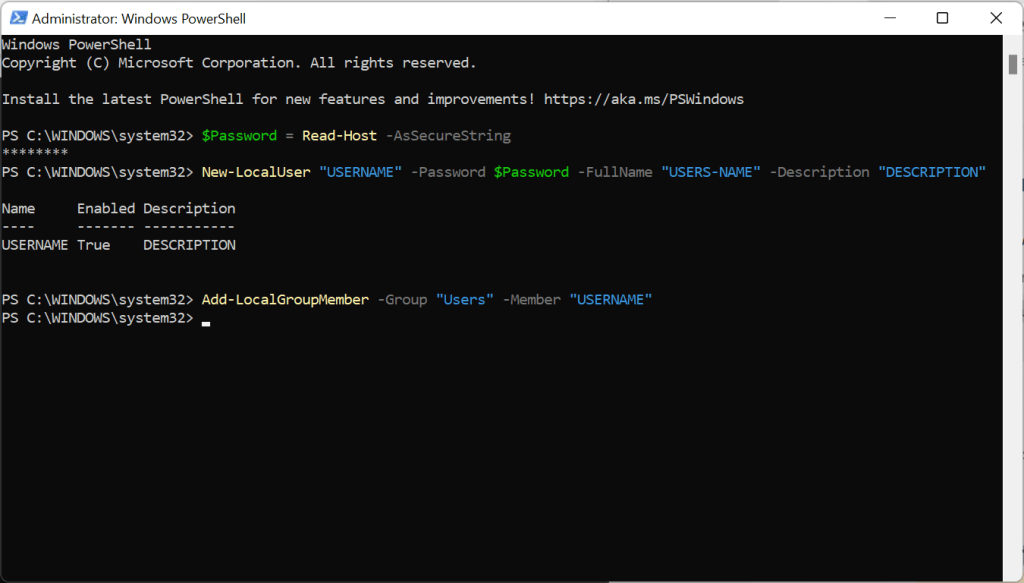
5. Use Powershell to Create a Local User Account
To create a local user account using Powershell: $Password = Read-Host -AsSecureString New-LocalUser “USERNAME” -Password $Password -FullName “USERS-NAME” -Description “DESCRIPTION” Add-LocalGroupMember -Group “ACCOUNT-TYPE” -Member “USERNAME”
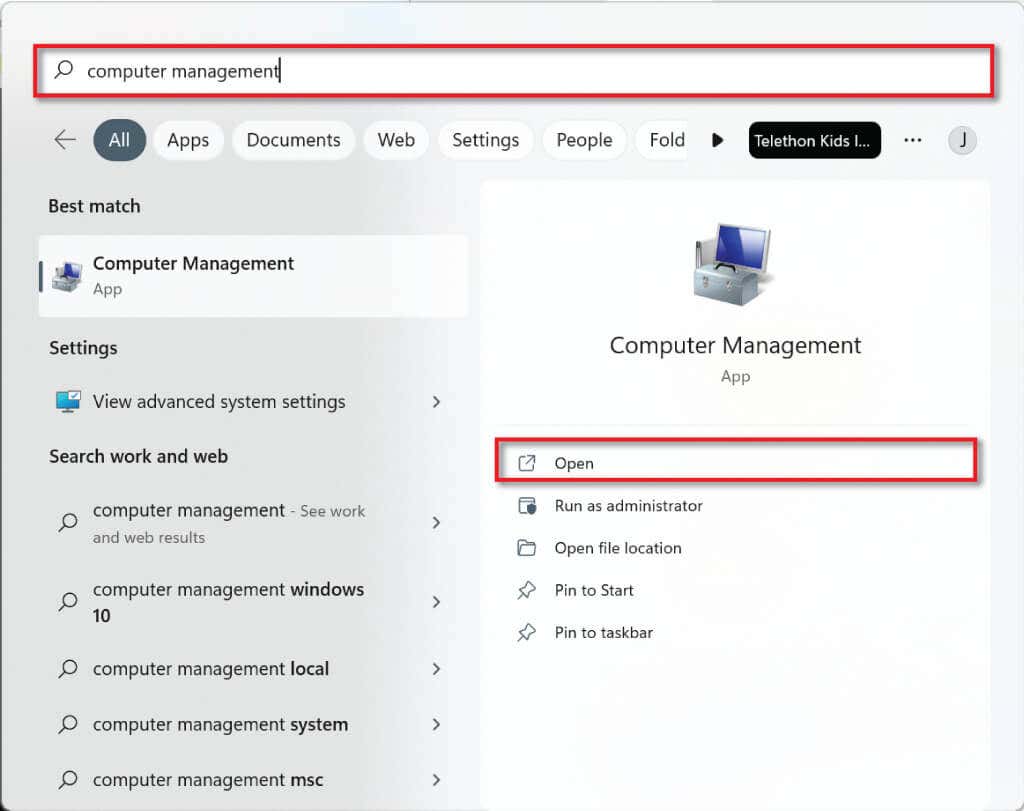
6. Use the Computer Manager to Create a Local User Account (Pro Only)
Windows 11 Pro users can create local user accounts through the Computer Manager. This method will not work if you are running Windows 11 Home.
Creating Local User Accounts on Windows 11
As you can see, it’s relatively easy to create a local user account on Windows 11. You can create as many of these accounts as you like and use them to separate work and private use or even let your family members use your PC without accessing your files. The choice is yours!