By default, Windows keeps the system clock in sync with Microsoft’s time servers. If that fails, you must manually change the time and date or forcibly synchronize the clock with a local time server. This tutorial will help you learn how to change the time, date, and region in Windows 11 and 10.
Manually Change Time and Date in Windows
The default date and time configuration in Windows keep the system time in sync with an internet time server. It could also use location services to set your region when traveling between different time zones. However, you can always manually adjust the time, date, and region if the clock is incorrect or you want to advance or roll back it for another reason.
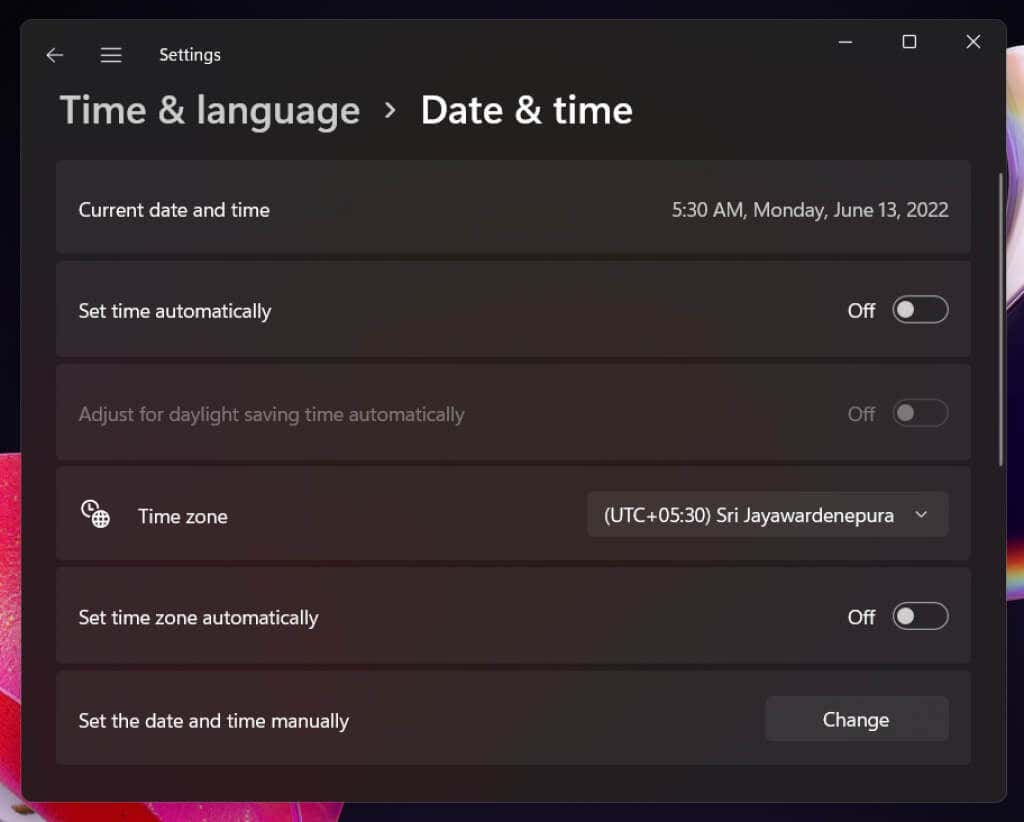
- Right-click the Clock on the taskbar and select Adjust date and time. Or, open the Start menu and select Settings > Time & language > Date & time.
- On the Settings window that launches, disable the switch next to Set time automatically. Also, turn off the Set time zone automatically setting (if active).
- Select the drop-down menu next to Time zone and set the correct region.
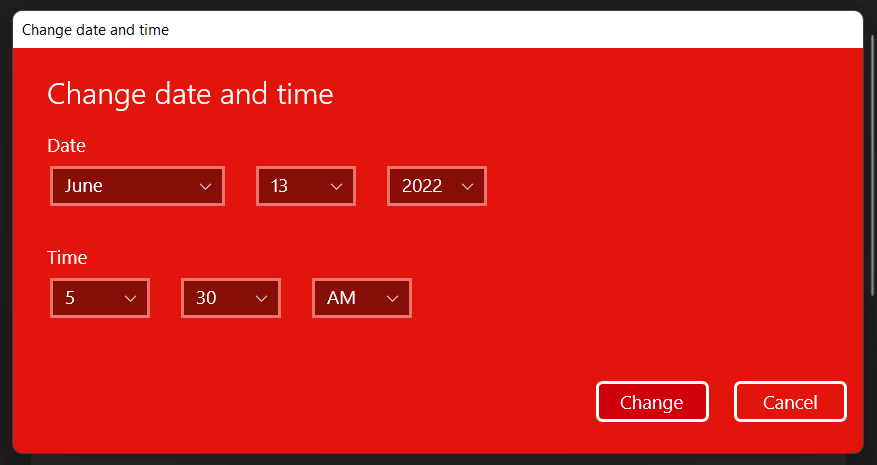
- Select the Change button next to Set date and time manually.
- Adjust the Date and Time fields as needed and select Change. Note: If you live in a region with daylight savings time, you can disable the Adjust for daylight saving time automatically setting if you don’t mind making the adjustments yourself.
Automatically Set Time and Date in Windows
Despite being able to set the time and date on your own, letting Windows sync the date and time with an internet time server is the best way to ensure the accuracy of the system clock. When automatic time-syncing fails, the following actions might get it working again.
- Right-click the Clock on the taskbar and select Adjust date and time.
- Disable the switch next to Set time automatically. Then, wait for a couple of seconds and turn it on again. That should prompt Windows to pull the correct time again. Note: If the time zone always appears incorrectly, make sure to disable the switch next to Set time zone automatically, select your region manually, and then toggle the Set time zone automatically switch off, then on.
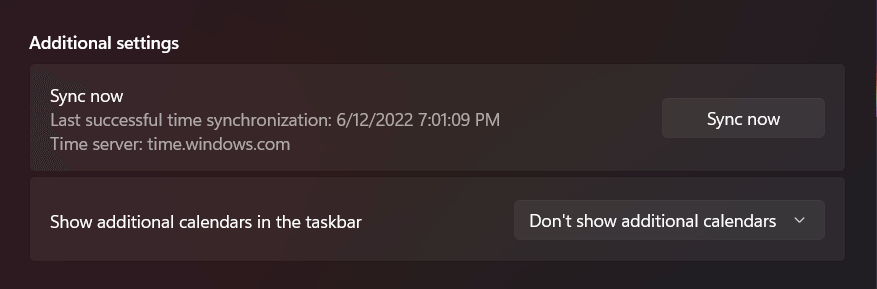
- If the issue persists, scroll down to Additional settings (Windows 11) or Synchronize your clock (Windows 10) and select the Sync now button That will forcibly sync the time and date with Microsoft’s time server.
Other Ways to Change Windows’ Date and Time
You’ve got a couple of alternative ways to change the time and date on your PC. One method involves the traditional Date and Time Control Panel applet, and the other is Command Prompt-based. Use them if you have trouble accessing the Settings app in Windows.
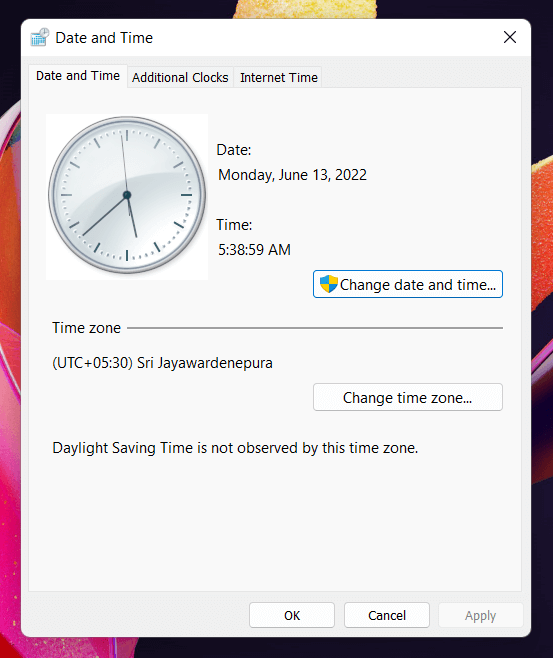
Date and Time Applet
You can set the PC time and date manually or automatically using the Date and Time applet. To access and use it:
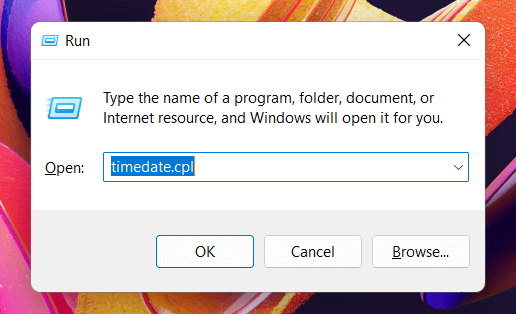
- Press Windows Key + R, type timedate.cpl, and press Enter.
- Use the Change date and time and Change time zone buttons to set the correct date and time.
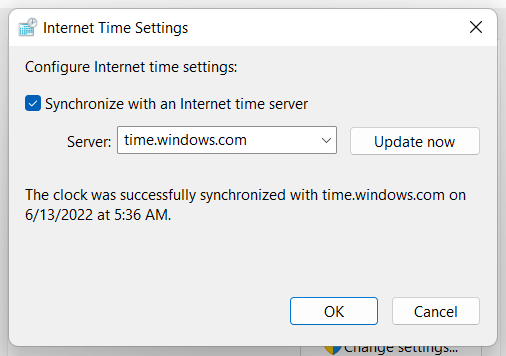
- Select the Internet Time tab on the top of the Date and Time window and select Change settings. If you want Windows to set the correct time automatically, make sure that the box next to Synchronize with an Internet time server is active. Note: If Microsoft’s time server always sets the wrong time, open the menu next to Server, select the server from the National Institute of Standards and Technology—time.nist.gov—and select Update now.
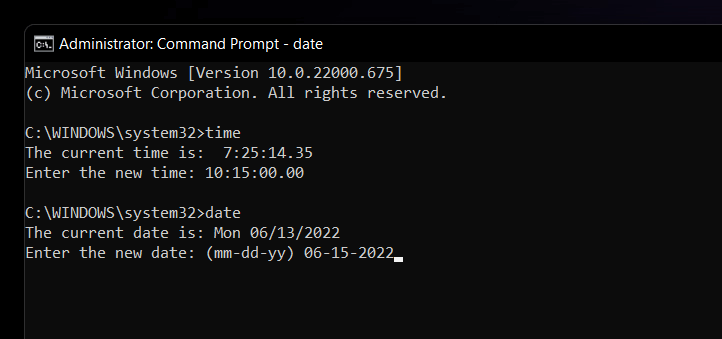
Command Prompt Console
Surprisingly, setting the time and date using the Command Prompt console is relatively straightforward. To do that:
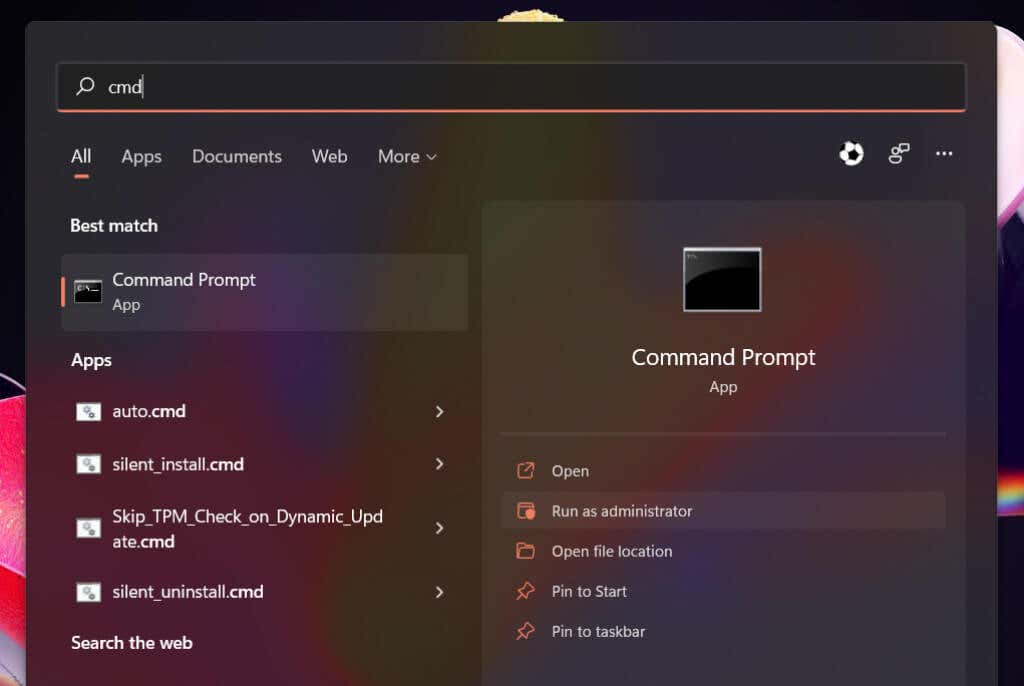
- Open the Start menu, type cmd, and select Run as administrator.
- Select Yes on the User Account Control pop-up.
- Type time and press Enter. Then, enter the correct time in the hh:mm:ss.ms format and press Enter. Next, run the date command and set the correct date in the mm-dd-yy format. Note: Disable automatic time-syncing via the Settings app or the Date and Time applet if you want to prevent Windows from adjusting your changes afterward.
The Correct Time and Date Matters
Many Windows issues stem from incorrectly setting the time and date, so don’t forget to manually adjust or force-sync the clock periodically with Microsoft’s time servers. Even if you intentionally change the time and date (such as to get an old program to work or speed up the in-game clock in a video game), it’s best to change that back quickly once you’re done.
However, if the time and date in Windows continue to appear wrong, it could be due to several reasons. For example, you might be dealing with a malware infection, an outdated operating system or BIOS/UEFI, or a dead CMOS battery. Check our complete guide to fixing the system clock in Windows to troubleshoot the issue.