Pressing the Alt key can sometimes completely block all key inputs thereafter. If you’re accidentally hitting these keys without knowing, it can cause major inconveniences and confusion. Many of the usual solutions that allow you to disable key inputs on Windows are now outdated. For example, Simple Disable Key is no longer freeware. Both SharpKeys and KeyTweak aren’t officially supported by the latest versions of Windows. So, what do you do when you’re out of options? You build your own!
Don’t be intimidated though—it’s extremely easy. In this article, we’re going to show you how you can disable any and every key you want using a free Windows application called AutoHotKey. The best part is that it doesn’t require any complicated configuration or rebooting to take effect.
Download and Install AutoHotKey
The first step to disabling any keyboard input on your Windows machine is to download a program called AutoHotKey. The link to the latest version will be at the top of the page in a blue button. Once you’ve downloaded AutoHotKey, run the installer.
Continue through the installation prompts using the default options, shown above. When the installation is complete, you can close out of it entirely. We don’t need to launch AutoHotKey just yet.
Building Your AutoHotKey Script
Now that you’ve downloaded AutoHotKey, it’s important to understand what it does. AutoHotKey allows you to create your own custom scripts that it will compile and run. Think of AutoHotKey as a simplified programming language that caters specifically to automation and creating Windows keyboard shortcuts. Learning a programming language is hard, but we’re here to simplify how you can use the powers of AutoHotKey to disable the input of any of your keyboard’s keys.
Pick Your Keys
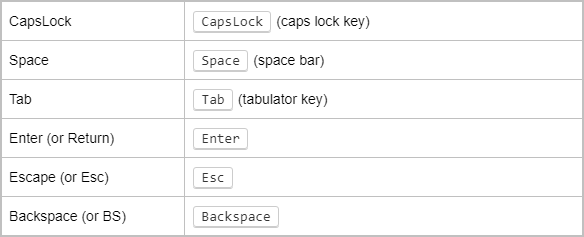
The first step is to pick out which keys you want to disable. Head over to the AutoHotKey documentation website to find a list of all supported keys.
For the sake of this example, we want to disable the Caps Lock key. On this page, you can see that AutoHotKey references that key as “CapsLock”. The left column shows the reference name(s) and the right column shows what key it corresponds with.
Open a Text Editor
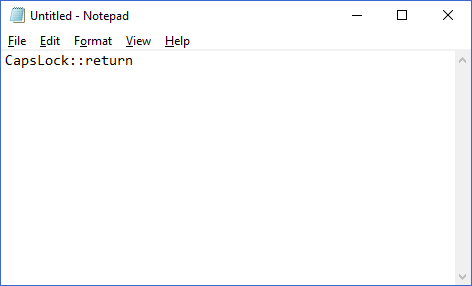
Next, open any text editor. It can even be Notepad, which we’ll use. In a blank document, type the key’s reference name followed by “::return”. Here’s how our Caps Lock example looks:
Can you believe that’s the only line of code you need to disable the key? If you decide that you want to disable more than one, you can repeat this same one-liner, on a new line, for each additional key.
Save Your Script
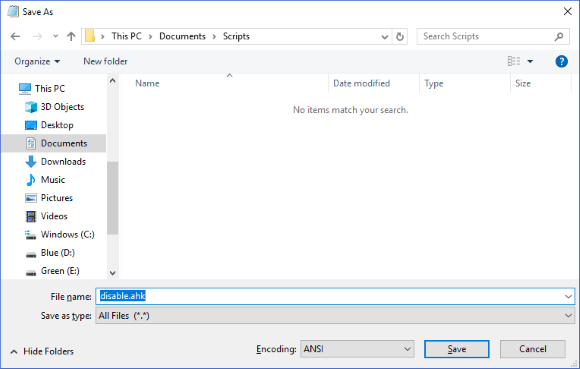
The next step is to save the script so that it can be run. You’ll want to pick a permanent spot for this, probably not on your desktop, because I’ll show you how to get this script to run at startup later.
In this example, we’ve chosen the “Scripts” folder within our Documents. After you choose a location to save it, change the “Save as type” to “All Files”. Then, type in a filename of your choice and be sure to append the “.ahk” extension. This is very important. Saving your file as an AHK lets your system know that it’s intended to be compiled and run by AutoHotKey.
Running Your AutoHotKey Script
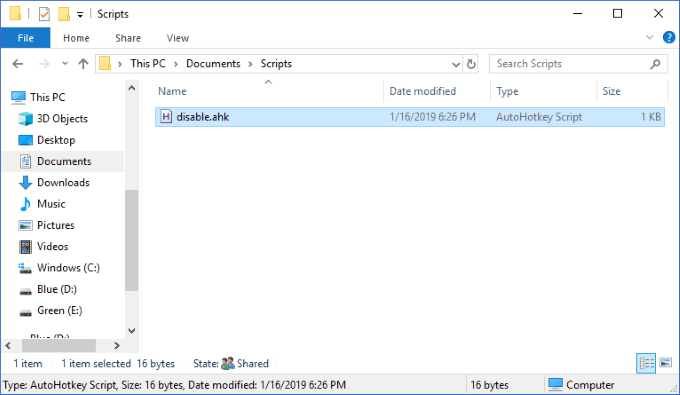
After you’ve saved your AHK file, navigate to where it’s saved at in Windows Explorer. You should see that the file’s icon is a sheet of paper with an “H” on it, meaning it’s associated with AutoHotKey.
Double-click the file. You may not notice anything happen, but you should see the AutoHotKey icon appear in your taskbar’s system tray.
It may be hidden by the time you see it, so you’ll need to click the upwards arrow icon to show your hidden system tray icons in that case. Now, try using the key that you’ve disabled. Does it work? If not, you’ve successfully disabled the key! If so, you may have done something wrong. Read over the instructions more carefully and try again.
Controlling Your AutoHotKey Script
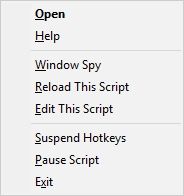
Right-clicking on the AutoHotKey icon in your taskbar’s system tray will bring up the following menu:
The two important options worth touching on are “Reload This Script” and “Suspend Hotkeys”. There may come a time when you’ll want to edit your AutoHotKey script while it’s actively running. Maybe you want to add another key to block, for example. After saving your changes to the AHK file, select the “Reload This Script” option. This will allow you to load your script’s changes without having to close and reopen the file. If you ever want to stop AutoHotKey from blocking any keys, select the “Suspend Hotkeys” option. Your AutoHotKey’s tray icon will change from an “H” to an “S” to indicate that hotkeys are being blocked. To re-enable all hotkeys, repeat this same action again.
Running Your Script on Startup
Now that you’ve got your script working, you may decide this is so important that you want it to automatically start with Windows. That’s easy to do.
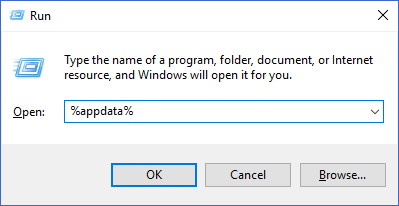
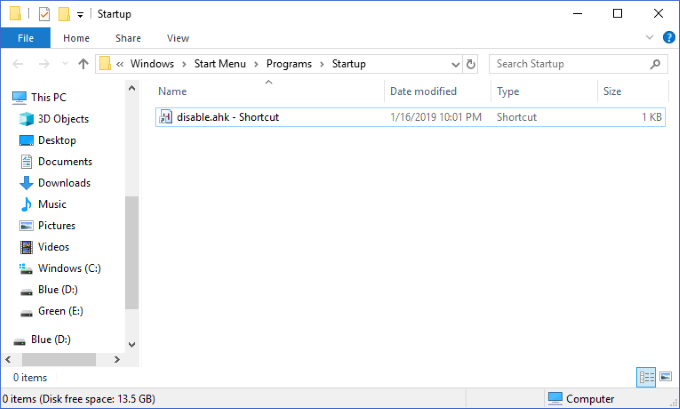
Press the Windows + R keys to bring up the Window’s Run prompt. In it, type “%appdata%” and hit Enter. This will bring you to the “Roaming” folder inside of “AppData”. Here, go through the following folders: Microsoft > Windows > Start Menu > Programs > Startup. In another Windows Explorer menu, navigate to the folder where your AutoHotKey script is saved. Right-click on it and click “Create shortcut”. This will create a shortcut for the file in that same folder. Drag and drop that shortcut into the “Startup” folder.
Adding the script to your startup this way allows you to make edits to the file’s original location rather than navigating all the way to this folder each time. If you make frequent edits, this is a big time-saver. That’s all it takes. With one simple line in an AutoHotKey script, you can disable any standard key on your keyboard and save yourself from hours of headaches. Don’t shop around the web for a simple and free solution to this problem, follow this guide and make one yourself!